
Blog 7: How to Brew Practically the Best Coffee
What is “The Best Coffee” ?
It is what I say it is. I’m only joking here. What I mean with practically the best coffee, I mean a pour over that can be made every day, including a busy morning when there is work or day when you’re tyred. An almost bullet proof way to brew a lovely cup of coffee, right on the cliff of the graph of diminishing reruns against effort. It goes without saying but, this depends gravely on your setup. If you have all the money in the world, you could just have a nice machine that makes it for you. For me, I think I really have found the perfect balance of fun, cost, versatility and taste.
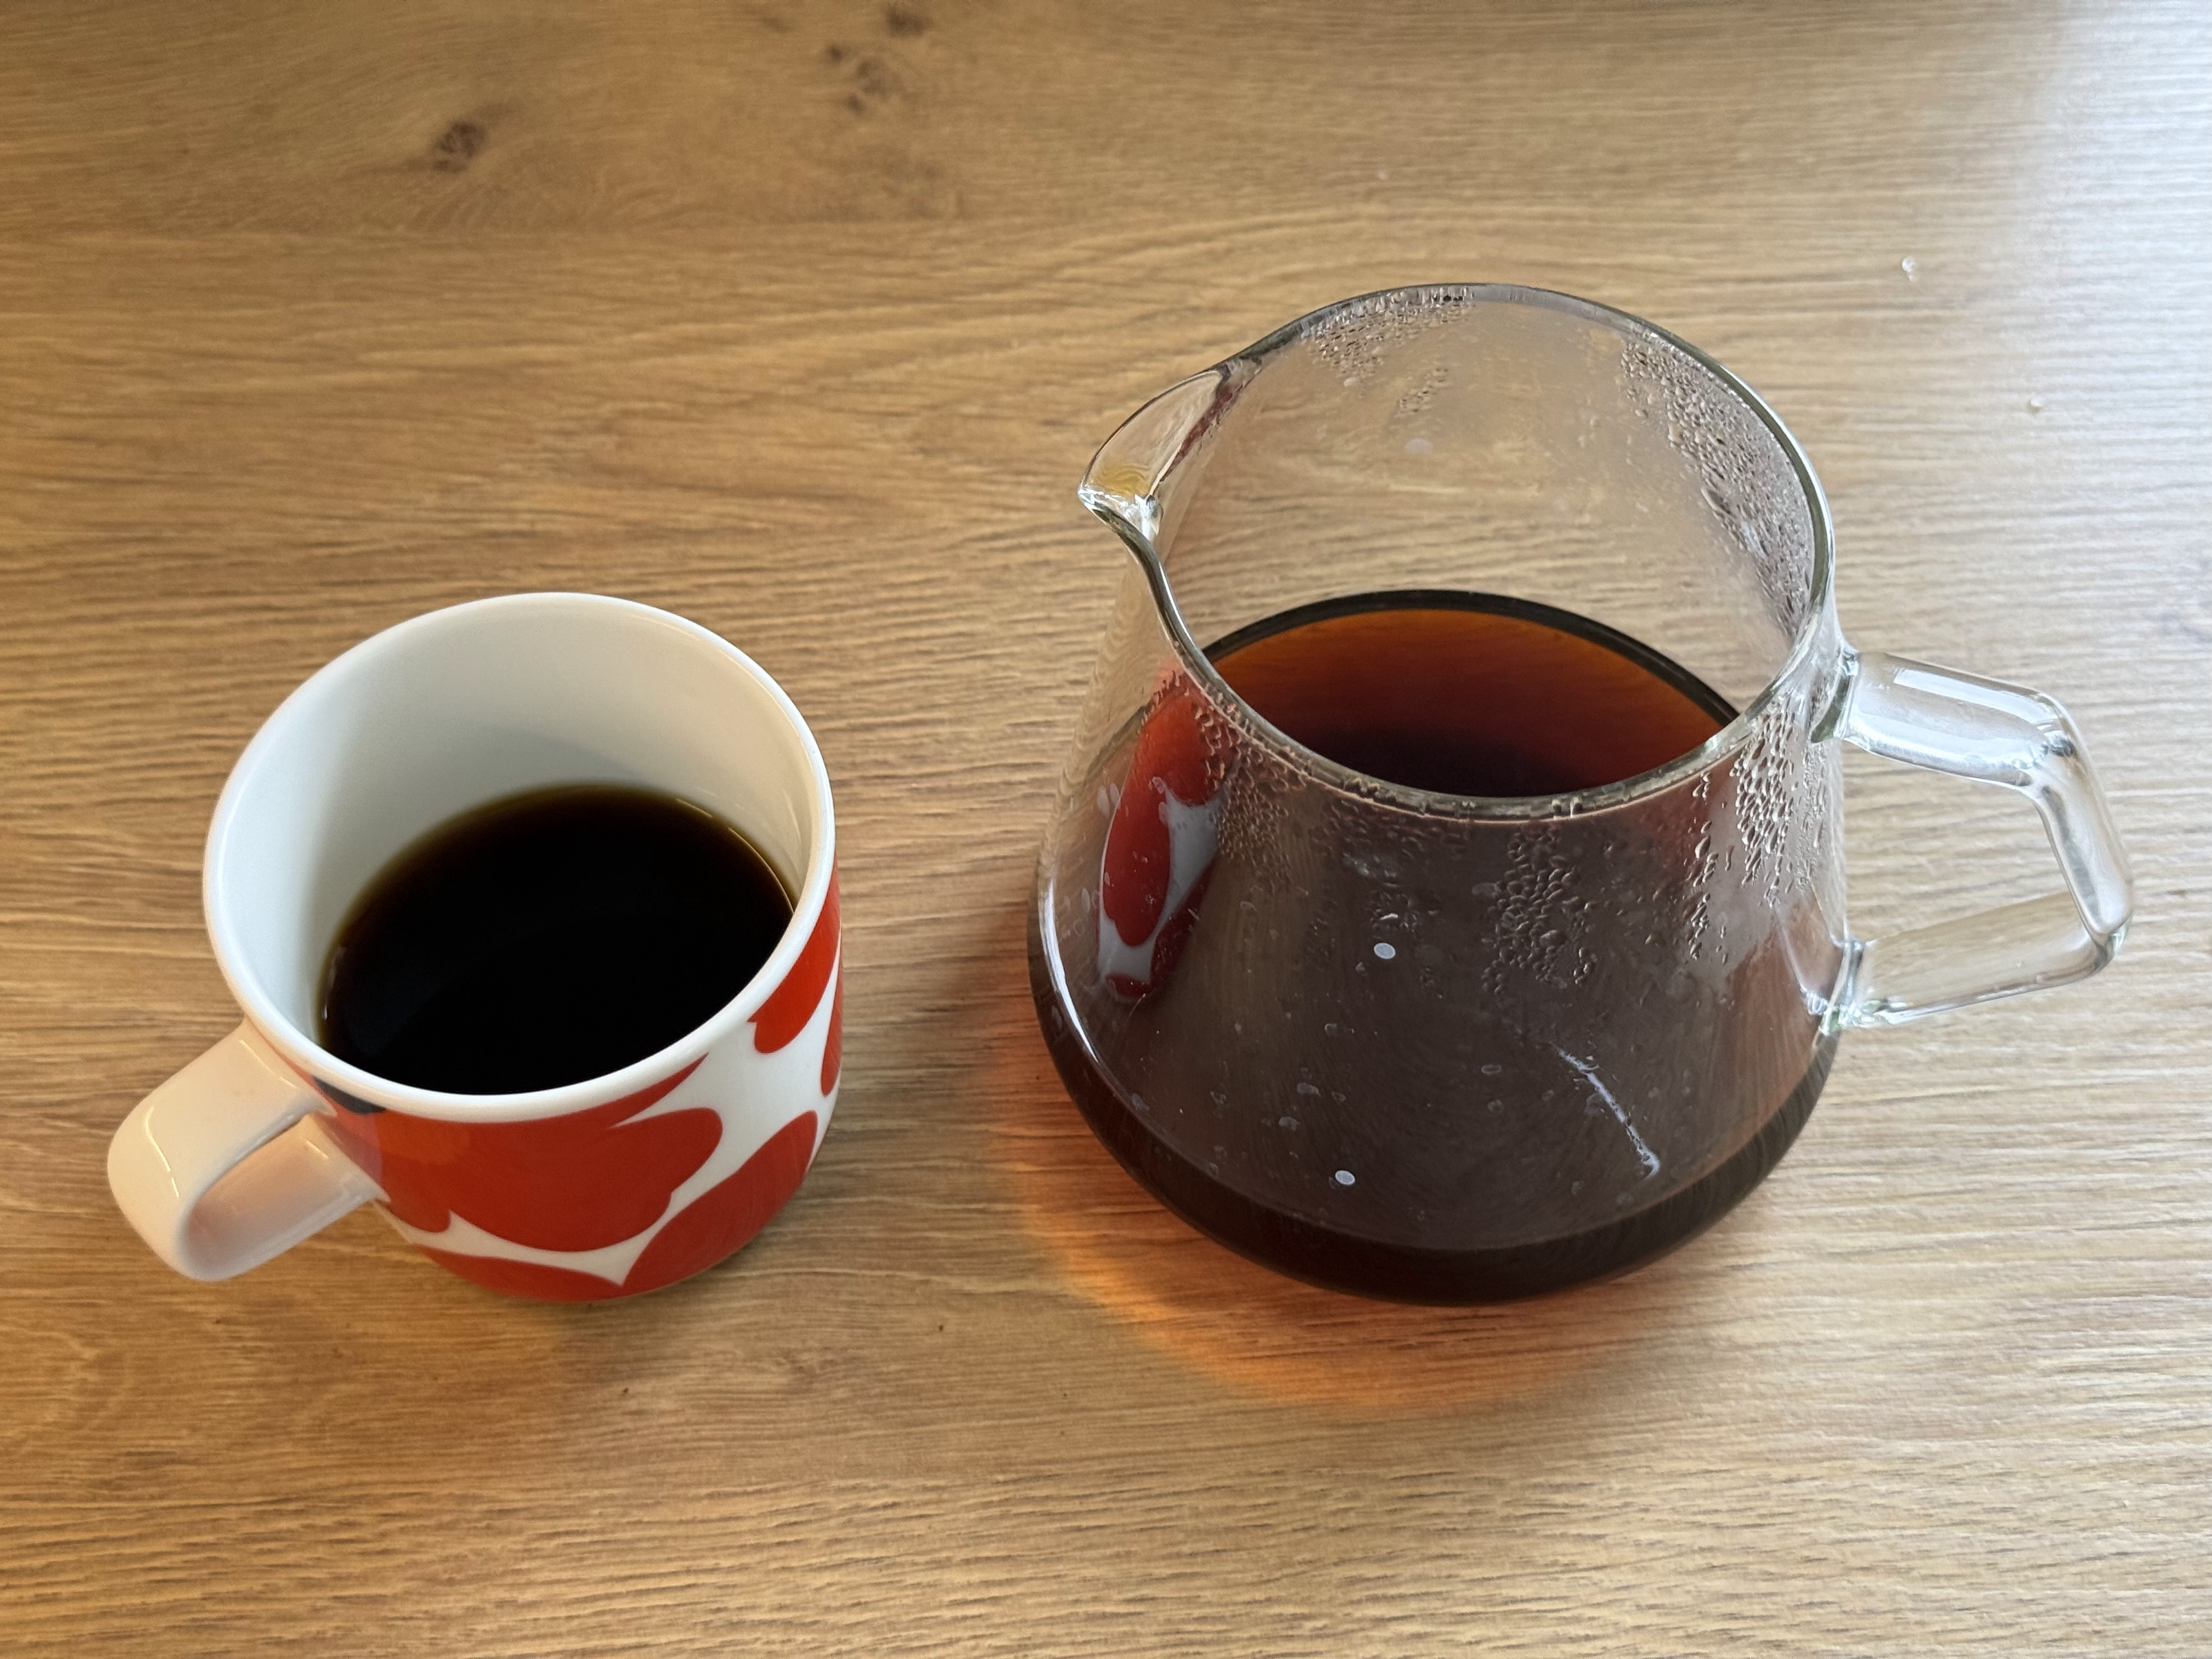
Just The Recipe.
Equipment
Making good coffee comes down to a few factors, good coffee and water, good gear and technique. Sadly the most expensive of these 4 is gear, but remember, where there’s a will there’s a way! And, cry once, pay once. True indeed… It took me years to get a good setup that I loved but after the initial investment, I didn’t have to spend much more and I’ve had good coffee for years.
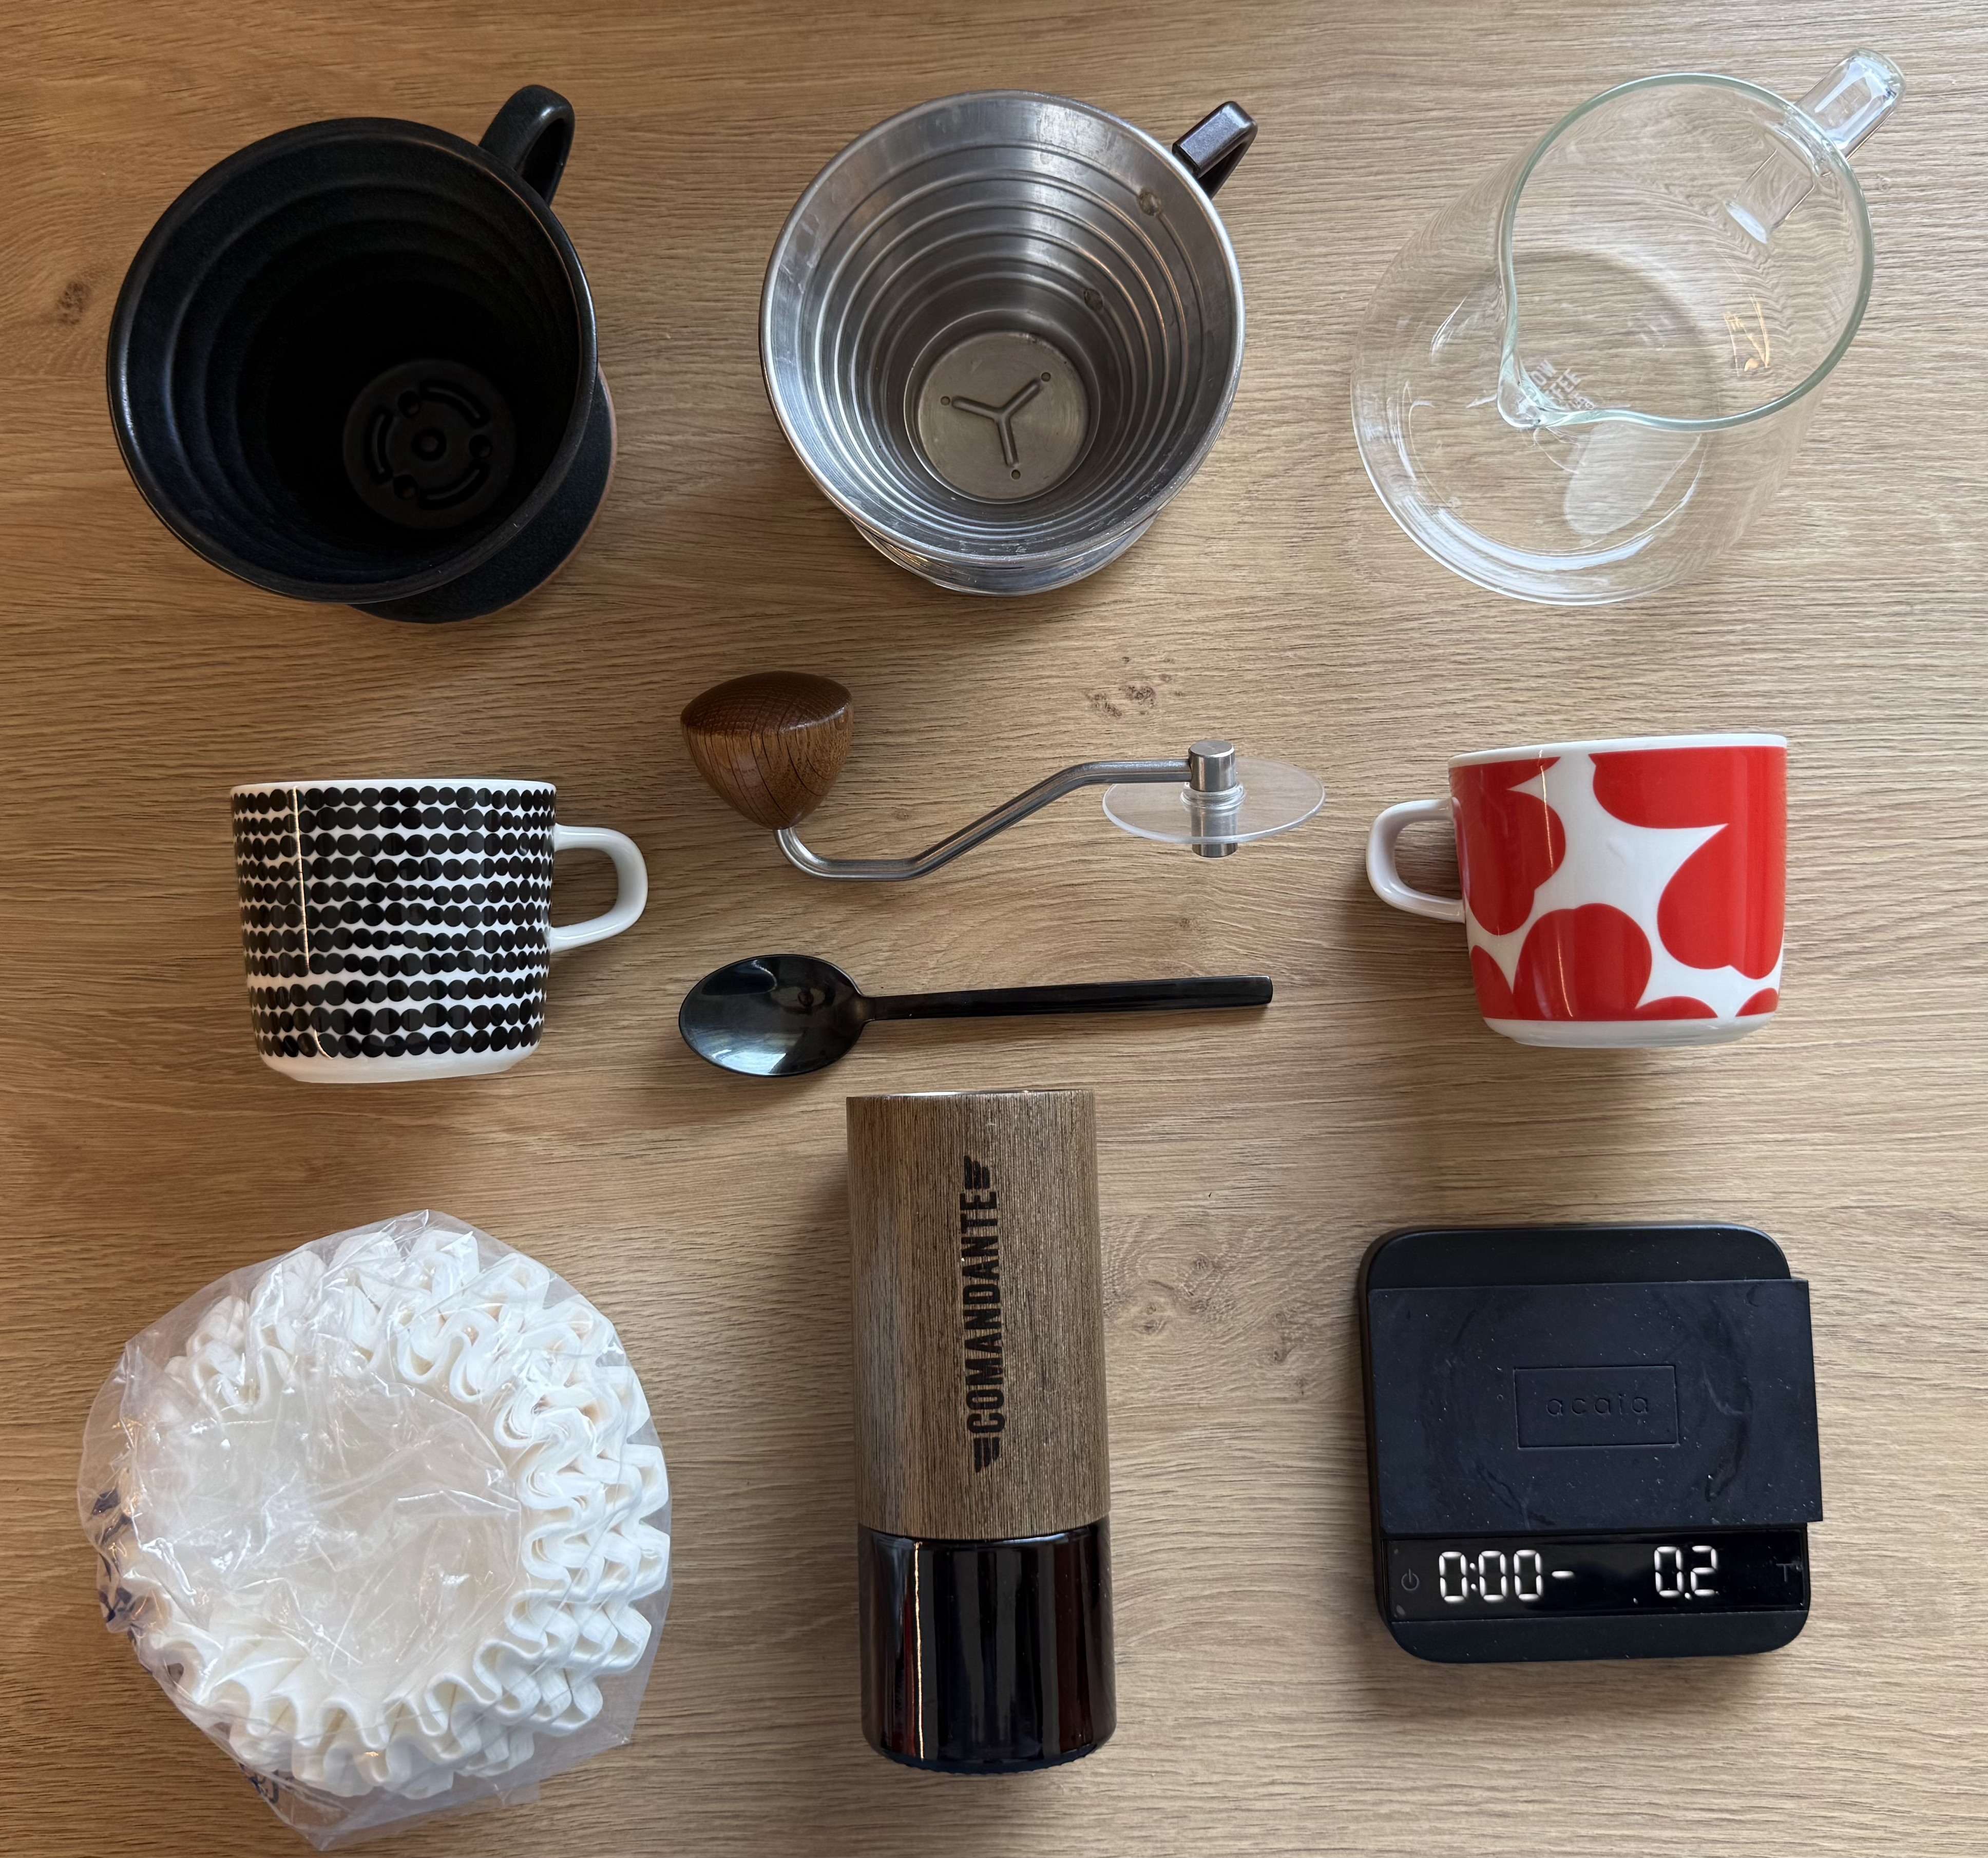
This is my gear, and here is a list from top left, going right and down:
- Ceramic Kalita Brewer
- Metal Kalita Brewer
- Kinto Slow Pour Decanter
- Marimeko Mug (Not essential, highly recommended)
- Teaspoon
- Marimeko Mug #2 (Because good coffee taste better when you share it with friends)
- Kalita Filters
- Comandante C-40 Nitro Blade Grinder
- Acaia Lunar Scale
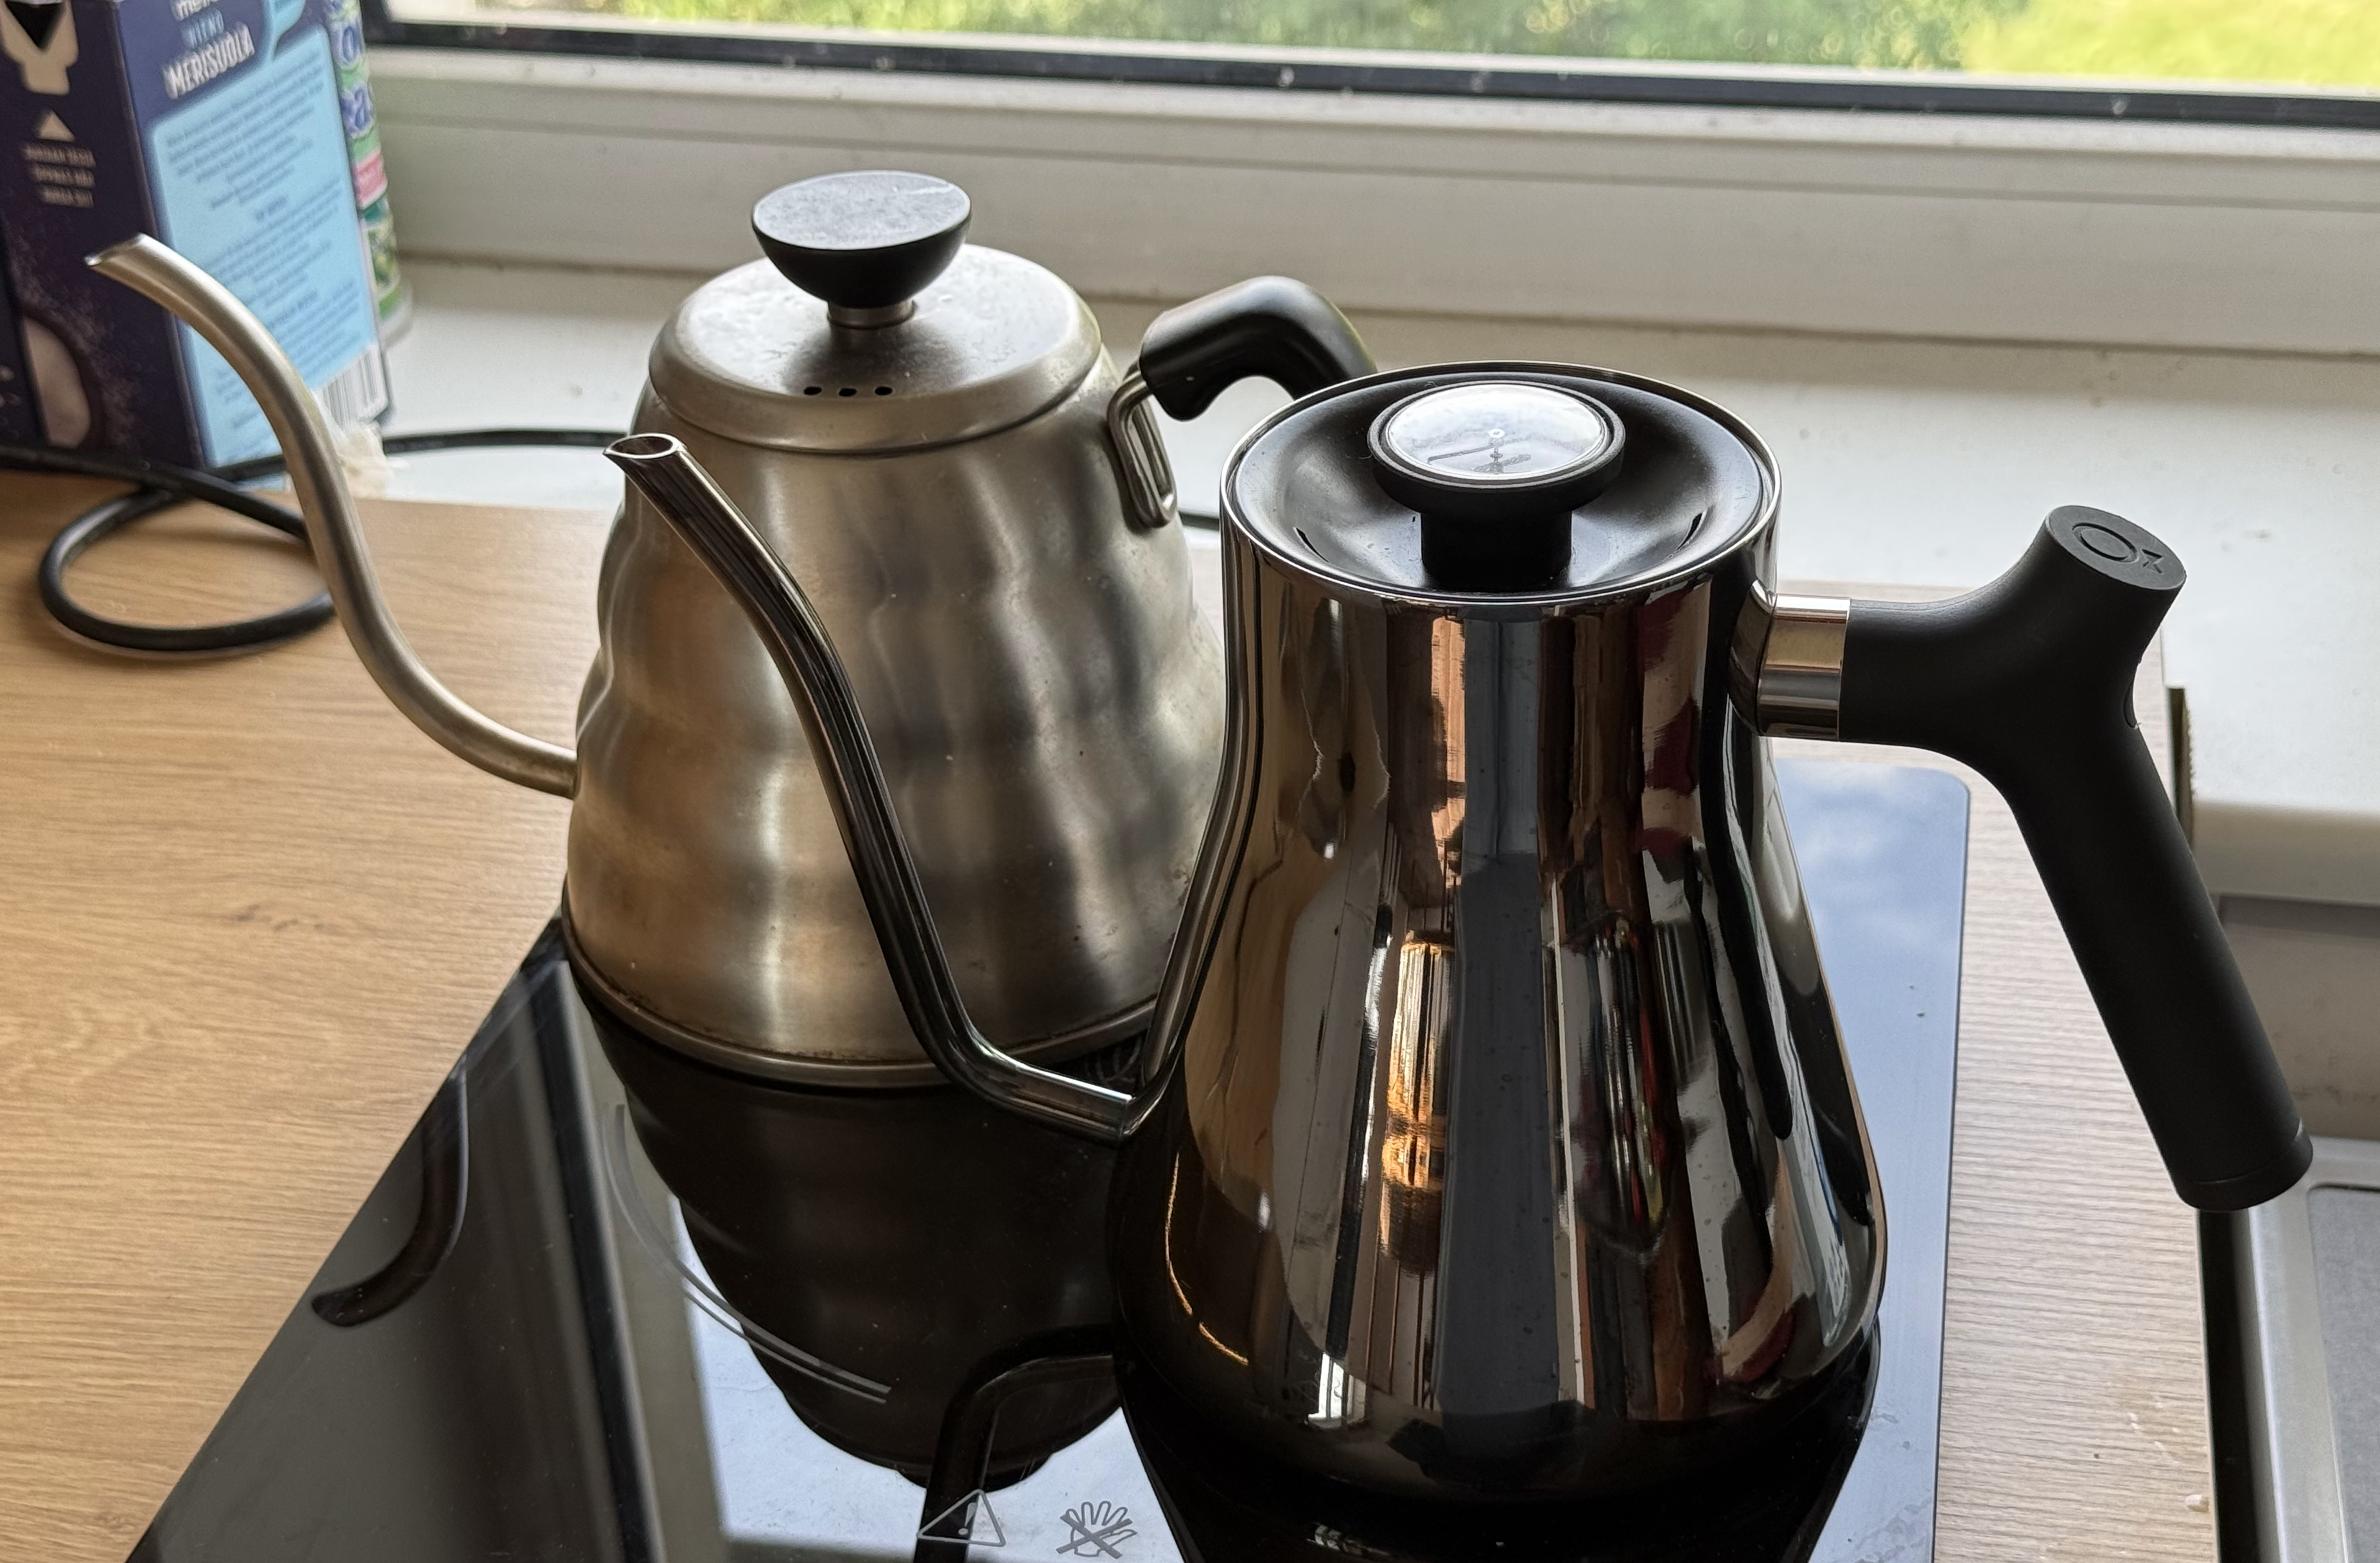 A goose neck kettle is super important, I use these
- Fellow (Black)
- Hario (Silver)
I bought that Hario kettle with my fist paycheck, I still own it, and I love it. I moved and I could not bring it with me, so I had to buy a new kettle, that’s why I have the fellow. The Fellow kettle is good, it has a thermometer built in, but I prefer my Hario kettle for sentimental reasons.
Why a Kalita Brewer
Because it is simple, reliable and fool proof. It just works. And if that is not the definition of practical, then I don’t know what is.
Coffee
I won’t go on detail on how to pick the correct coffee. And I am being very intentional when I say “the correct coffee”, there is such a thing as that, because when there are options as some mass produced Folgers coffee I feel that there is a certain level of personal responsibility that needs to be employed here (The word responsibility is doing a lot of heavy lifting here, you’re not really responsible if you don’t have the material means to act upon such things etc. that’s what I mean by “responsibility” here).
What I are looking in the correct coffee:
- Whole bean.
- Local roaster (Whenever possible) to support local businesses.
- Single origin.
- Medium to light roast.
- A roast date no older than 3 weeks before purchase.
- Not an experimental coffee because they are not practical.
Today’s Selection
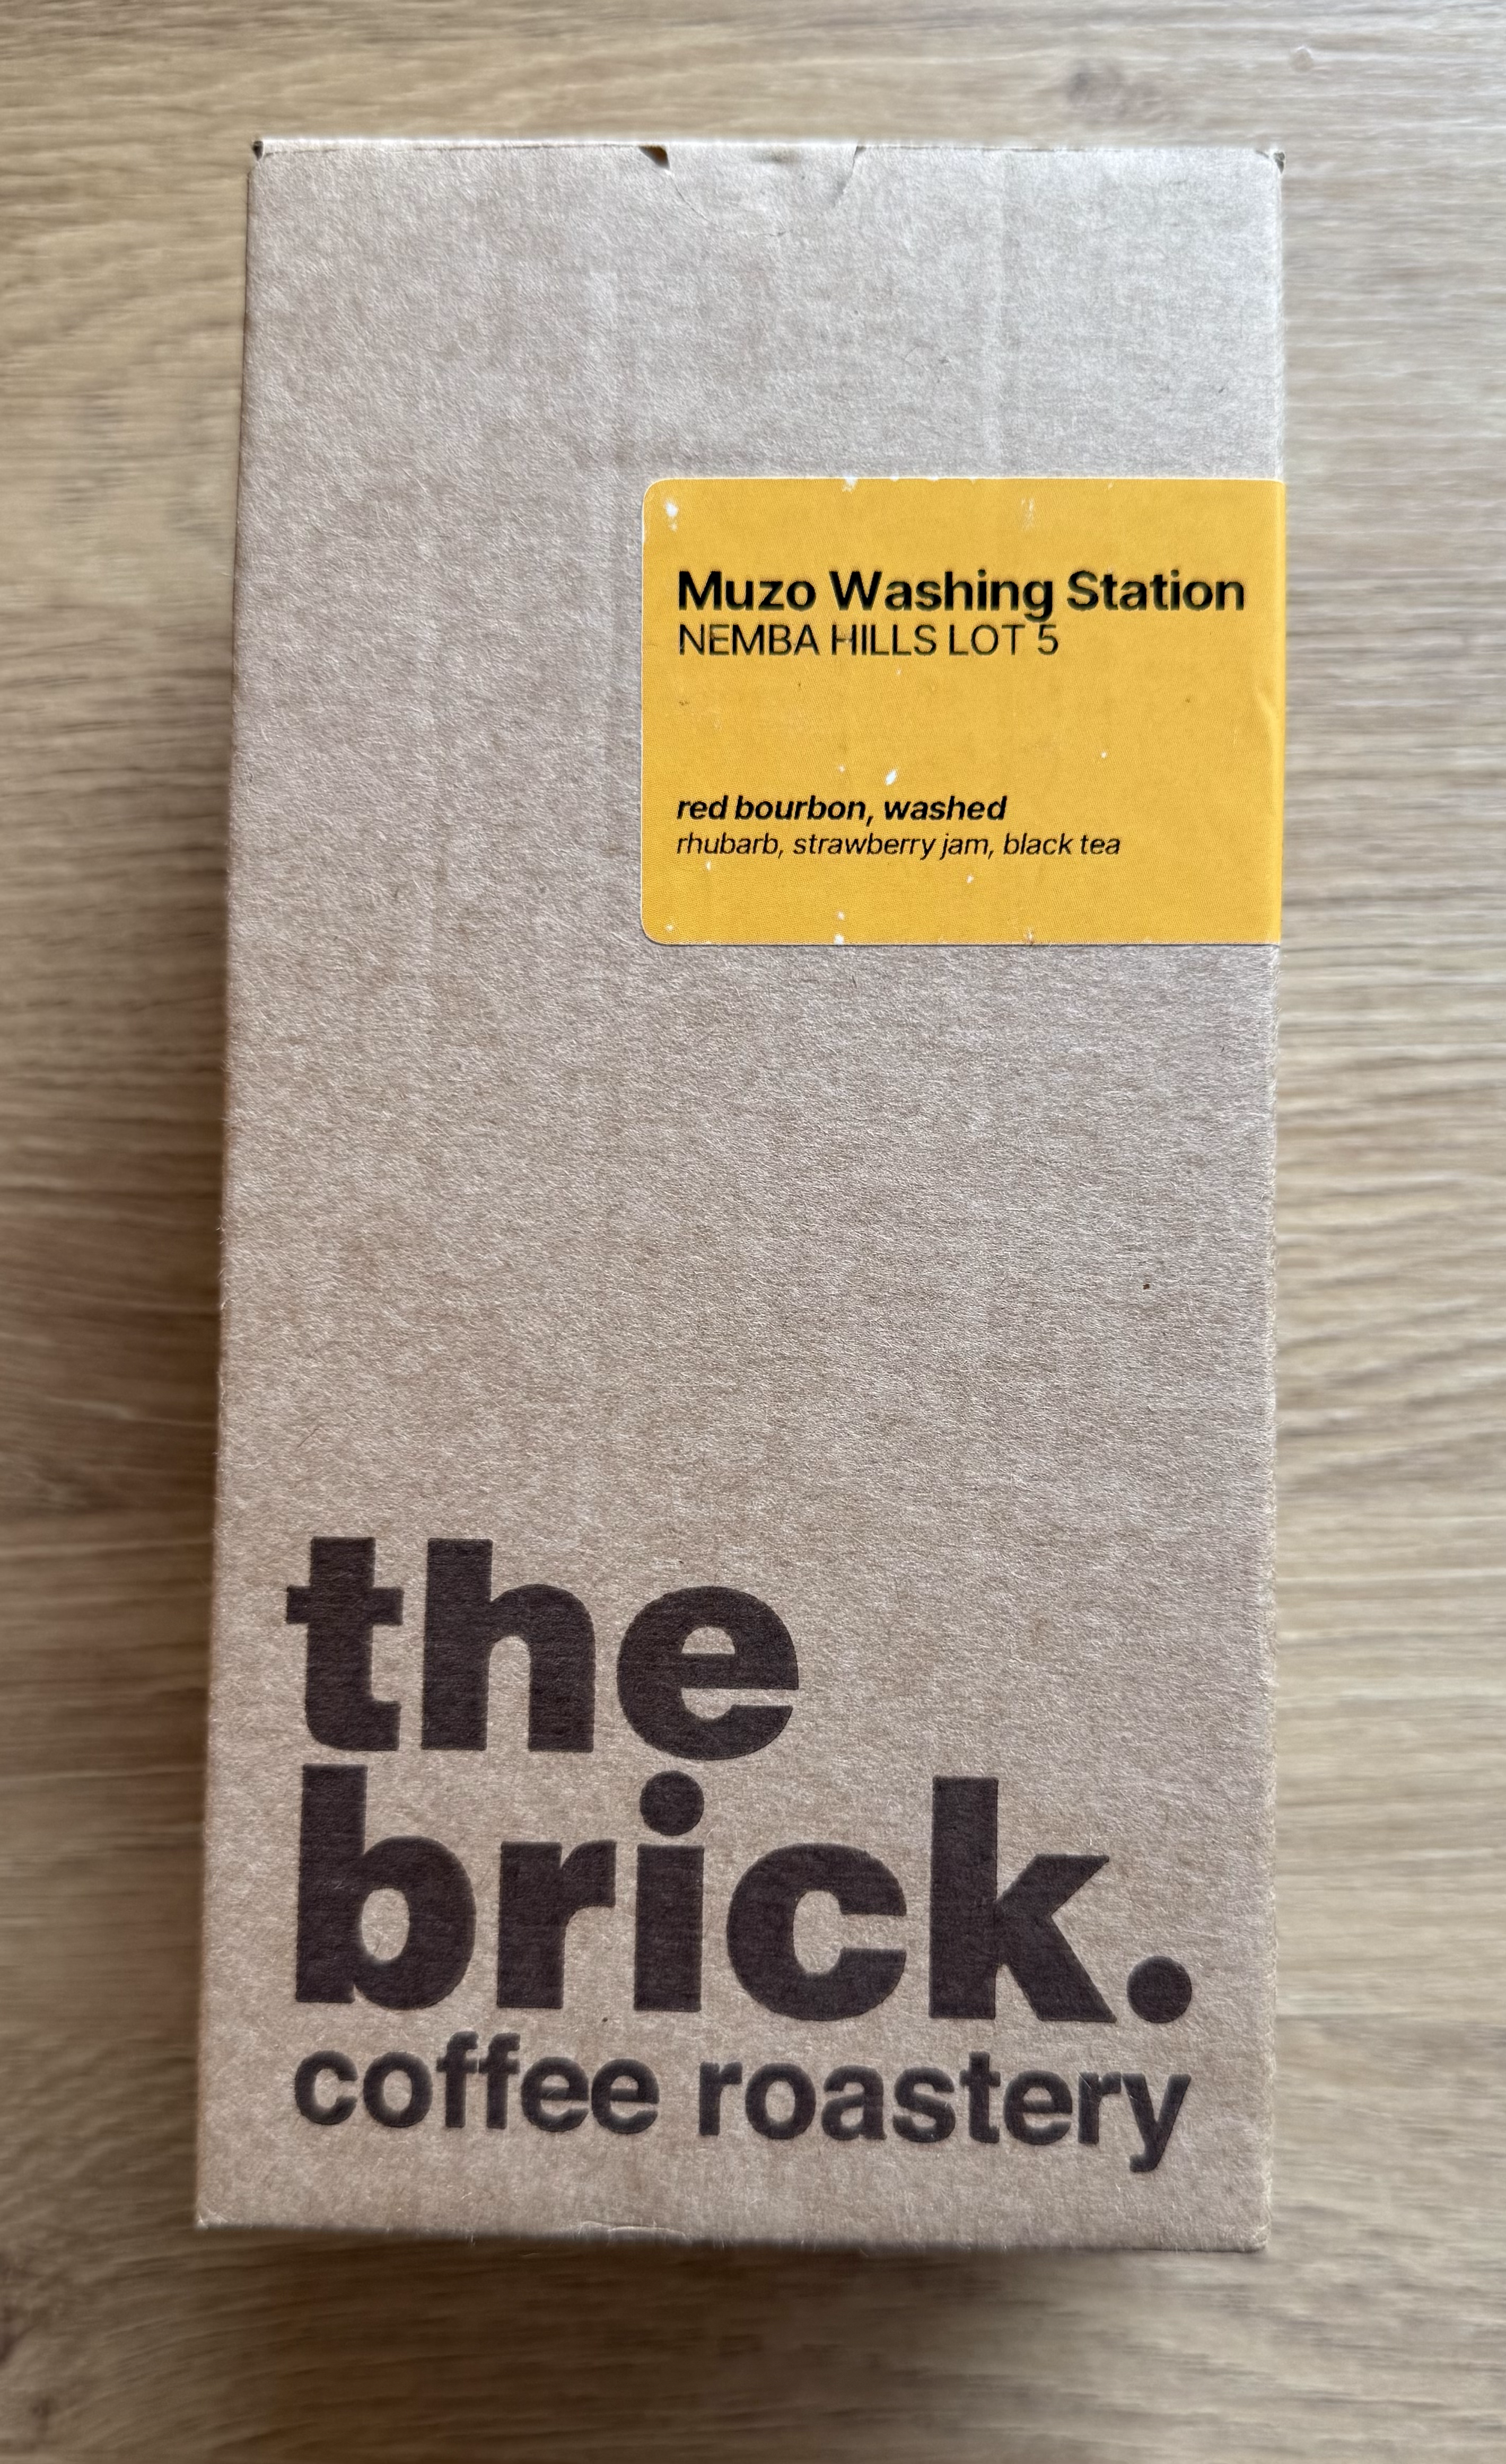
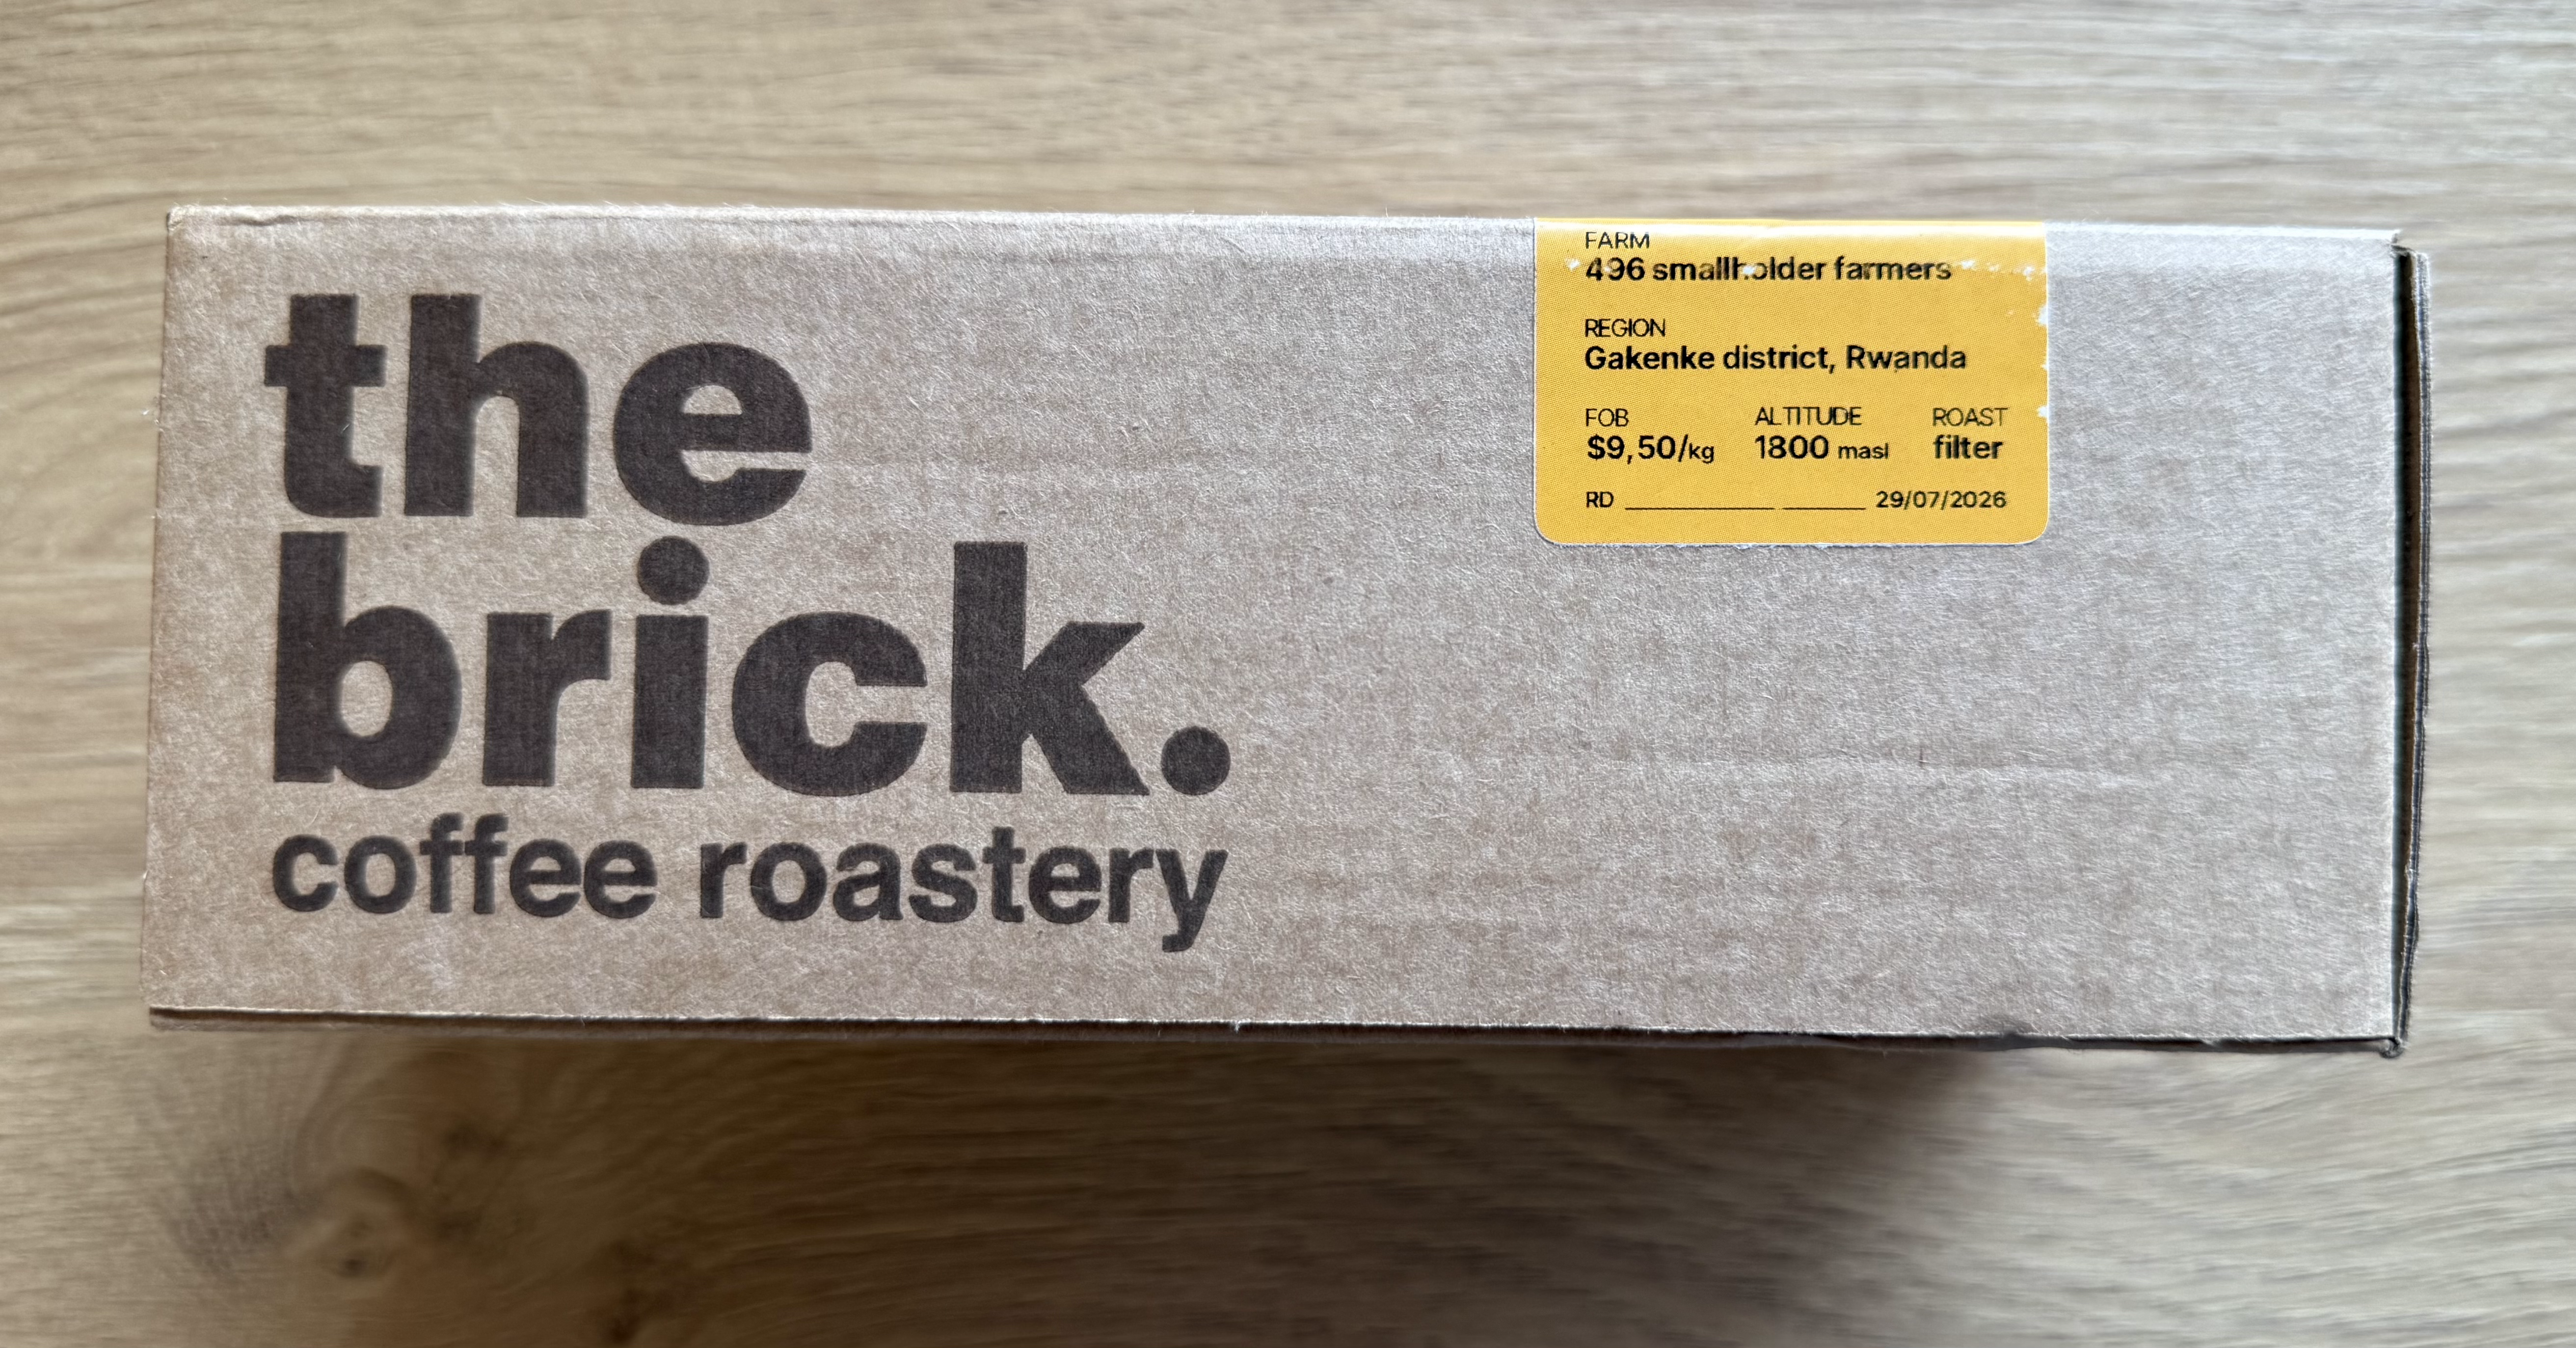
I had the luxury of purchasing some wonderful coffees from the cool guys at The Brick Coffee Roasters in Tallinn, Estonia. Very friendly folks, I chatted with the owner for a long time, he’s serious about his mission and I believe businesses like this bring a positive impact to the region.
So the coffee in question comes from Muzo Washing Station, Nemba Hills Lot 5 in the Gakenke district region of Rwanda. Grown at 1800 MASL1 , and they say the roast profile is for filter, I guess this is what they call a light roast. This coffee was roasted 29Th of June 2026, I bought it August 10Th. Coffee beans are Red Bourbon, washed. My favorite variety, bourbon. The packaging comes in a brick. So I can claim that I have a real nice brick of Rwandan Natural in my luggage at the airport, they’ll love it. -Oh yeah I head some guy’s are selling bricks of Colombian in Tallinn, Real good shit. I’m very funny. I really love the packaging, it clearly puts all the information I want to read, no shortcuts.
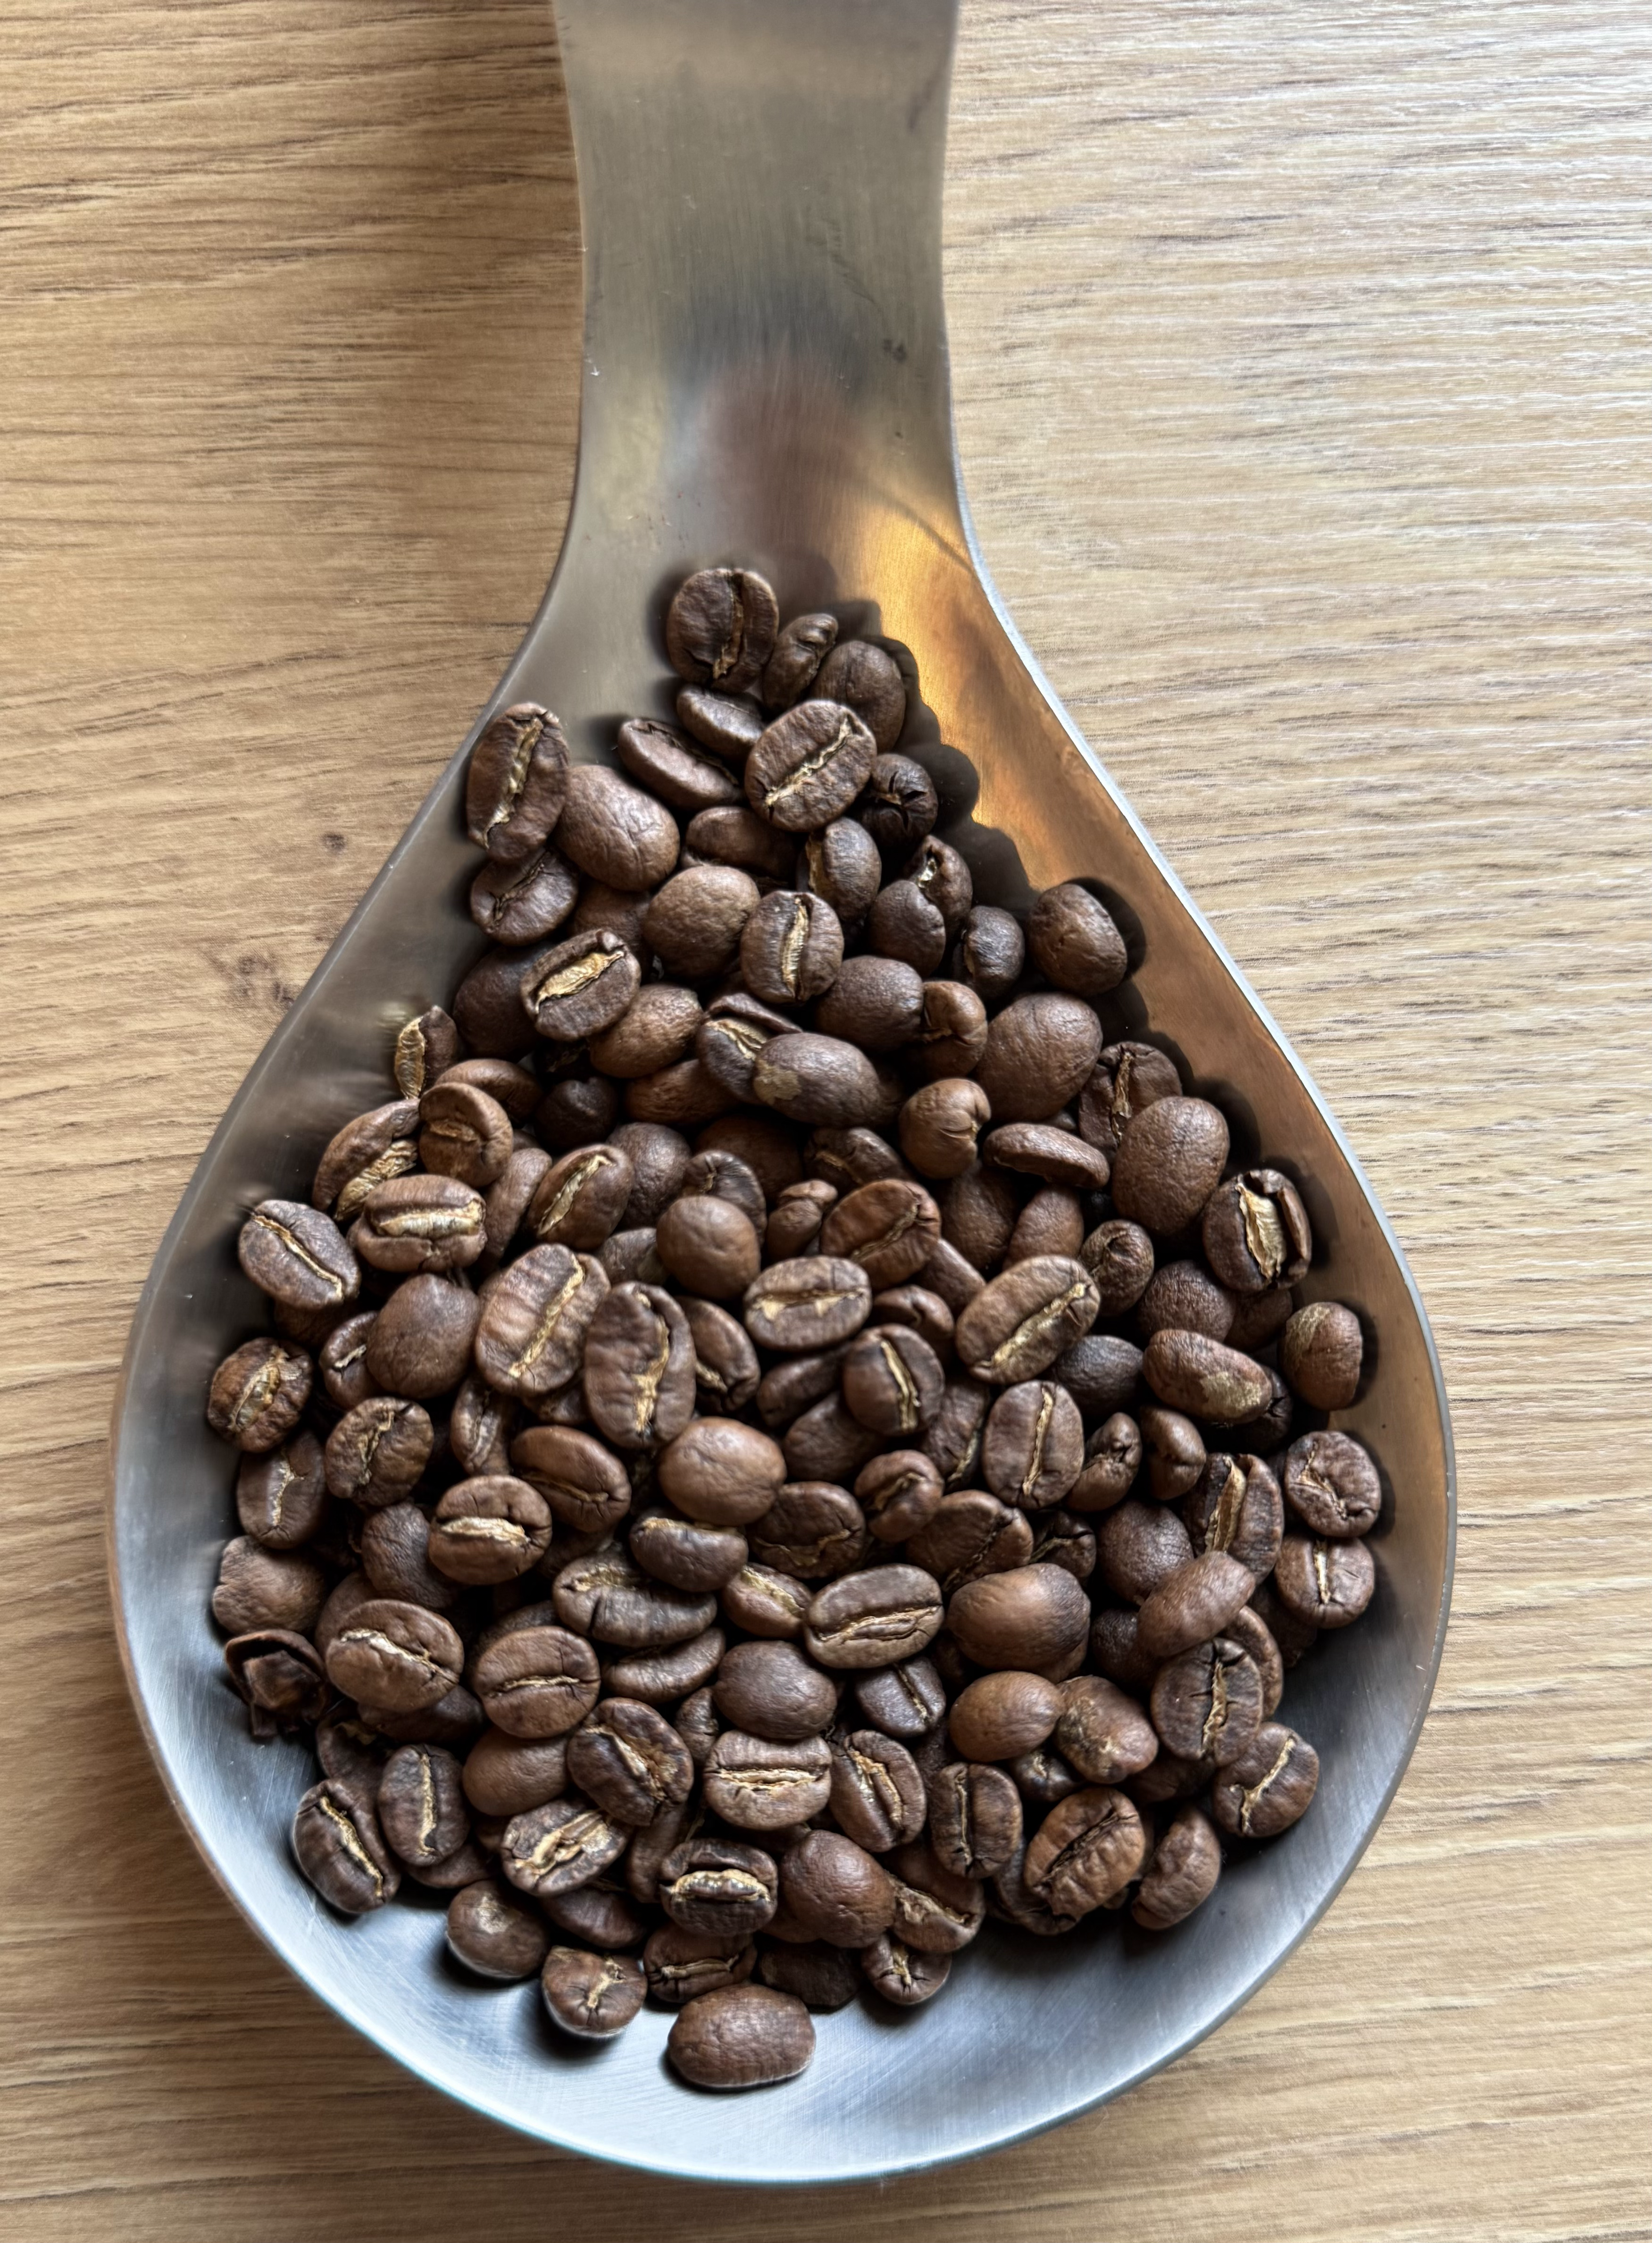
Beans look like the real deal, Bourbon coffee beans are smaller than Titpica, and because this is a washed coffee we can see the silverskin or shaft still clinging to the heart of the coffee, we got the real deal. The roast is good, it’s even enough, but there’s still some color variation, I don’t know if that is due to the green coffee or the roaster, but I am just being very picky here, this coffee is as good as they come.
Brewing!
This recipe I use a 1:15 ratio2 For a 300ml yield approximately in about 3 minutes time with a 45 second bloom. This calls for about 19g-20g of coffee. This is a very standard ratio that produces a coffee in strength similar to a batch brew. I chose 300ml as the yield because it’s the perfect personal amount of caffeine I need to get my day started. I used to brew 500ml a day but since my days are more calm now I don’t need that much caffeine and the volume was very large, I got way too full.
The Grind
The coffee grind I mean. For my Comandante grinder I use 22 clicks for brewing with a Kalita. Depending on the coffee and my water. As I go through the bag of coffee I would adjust ±4 clicks one click at a time to make the coffee finish brewing around the 3 minute mark. I will show how the ground coffee looks like for other people who don’t have a Comandante grinder in the following sections.
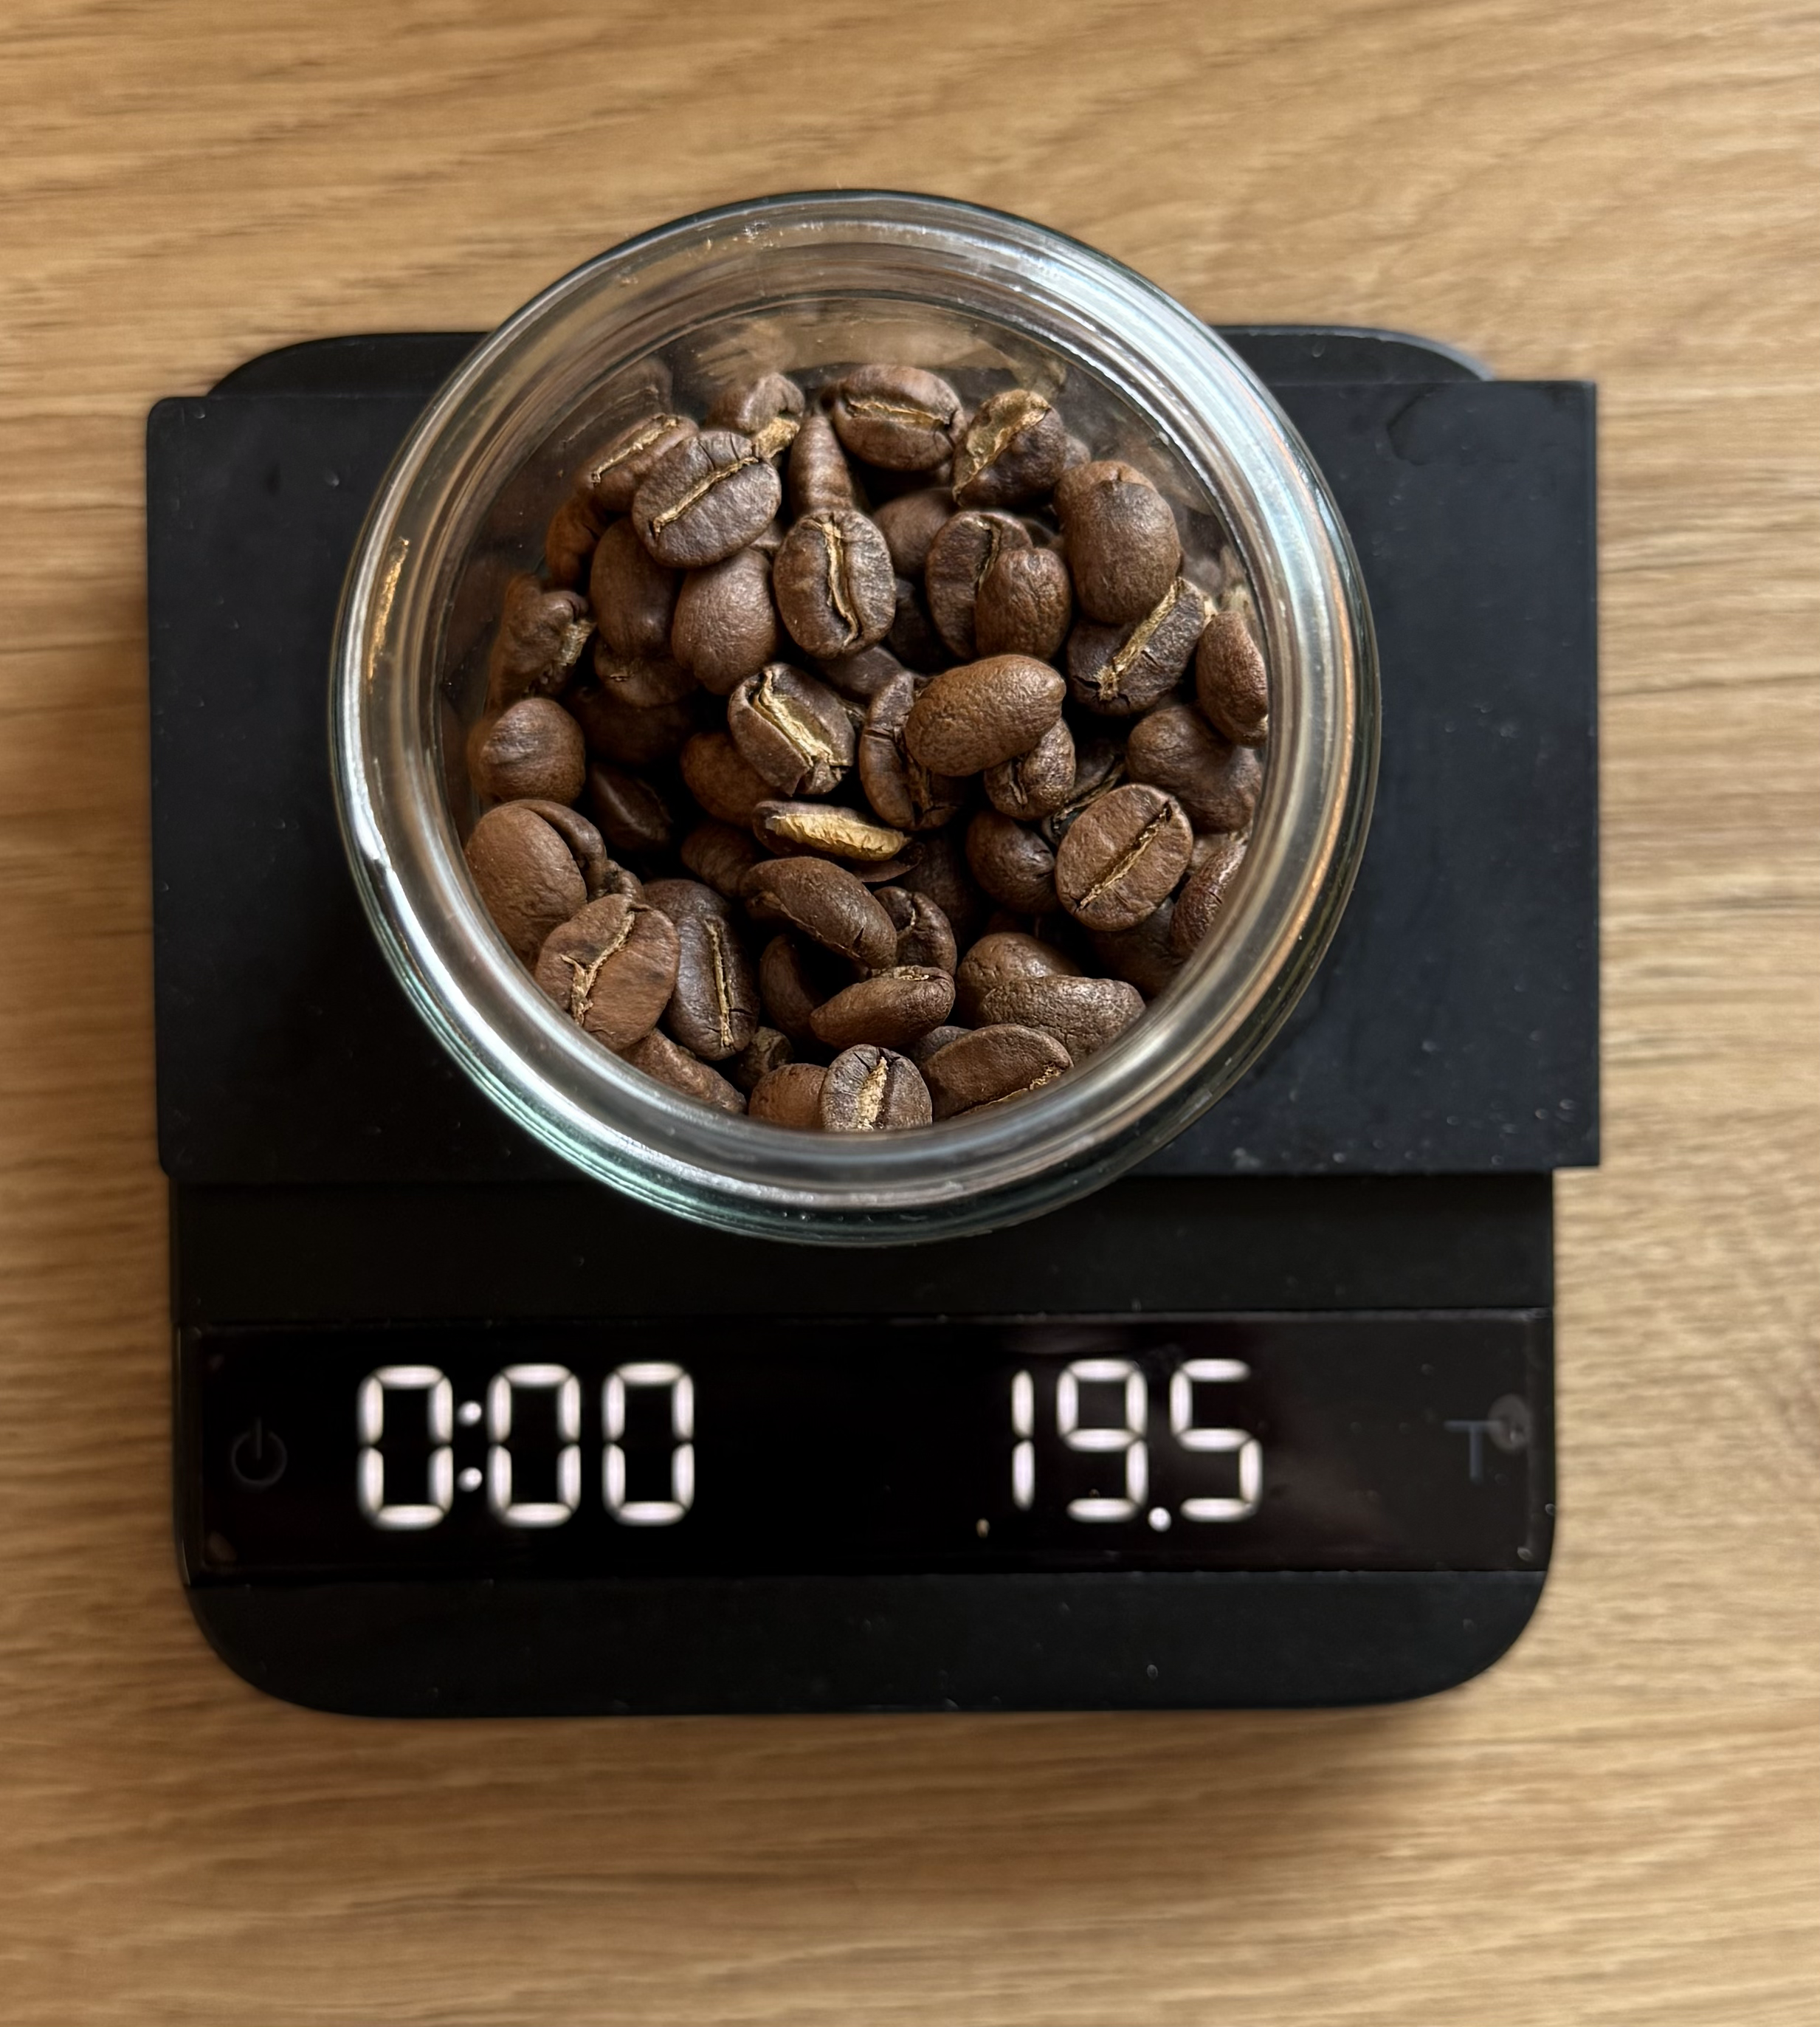
While grinding the coffee it’s a good idea to begin heating the water, I recommend heating up no less than 500ml.
The Rinse
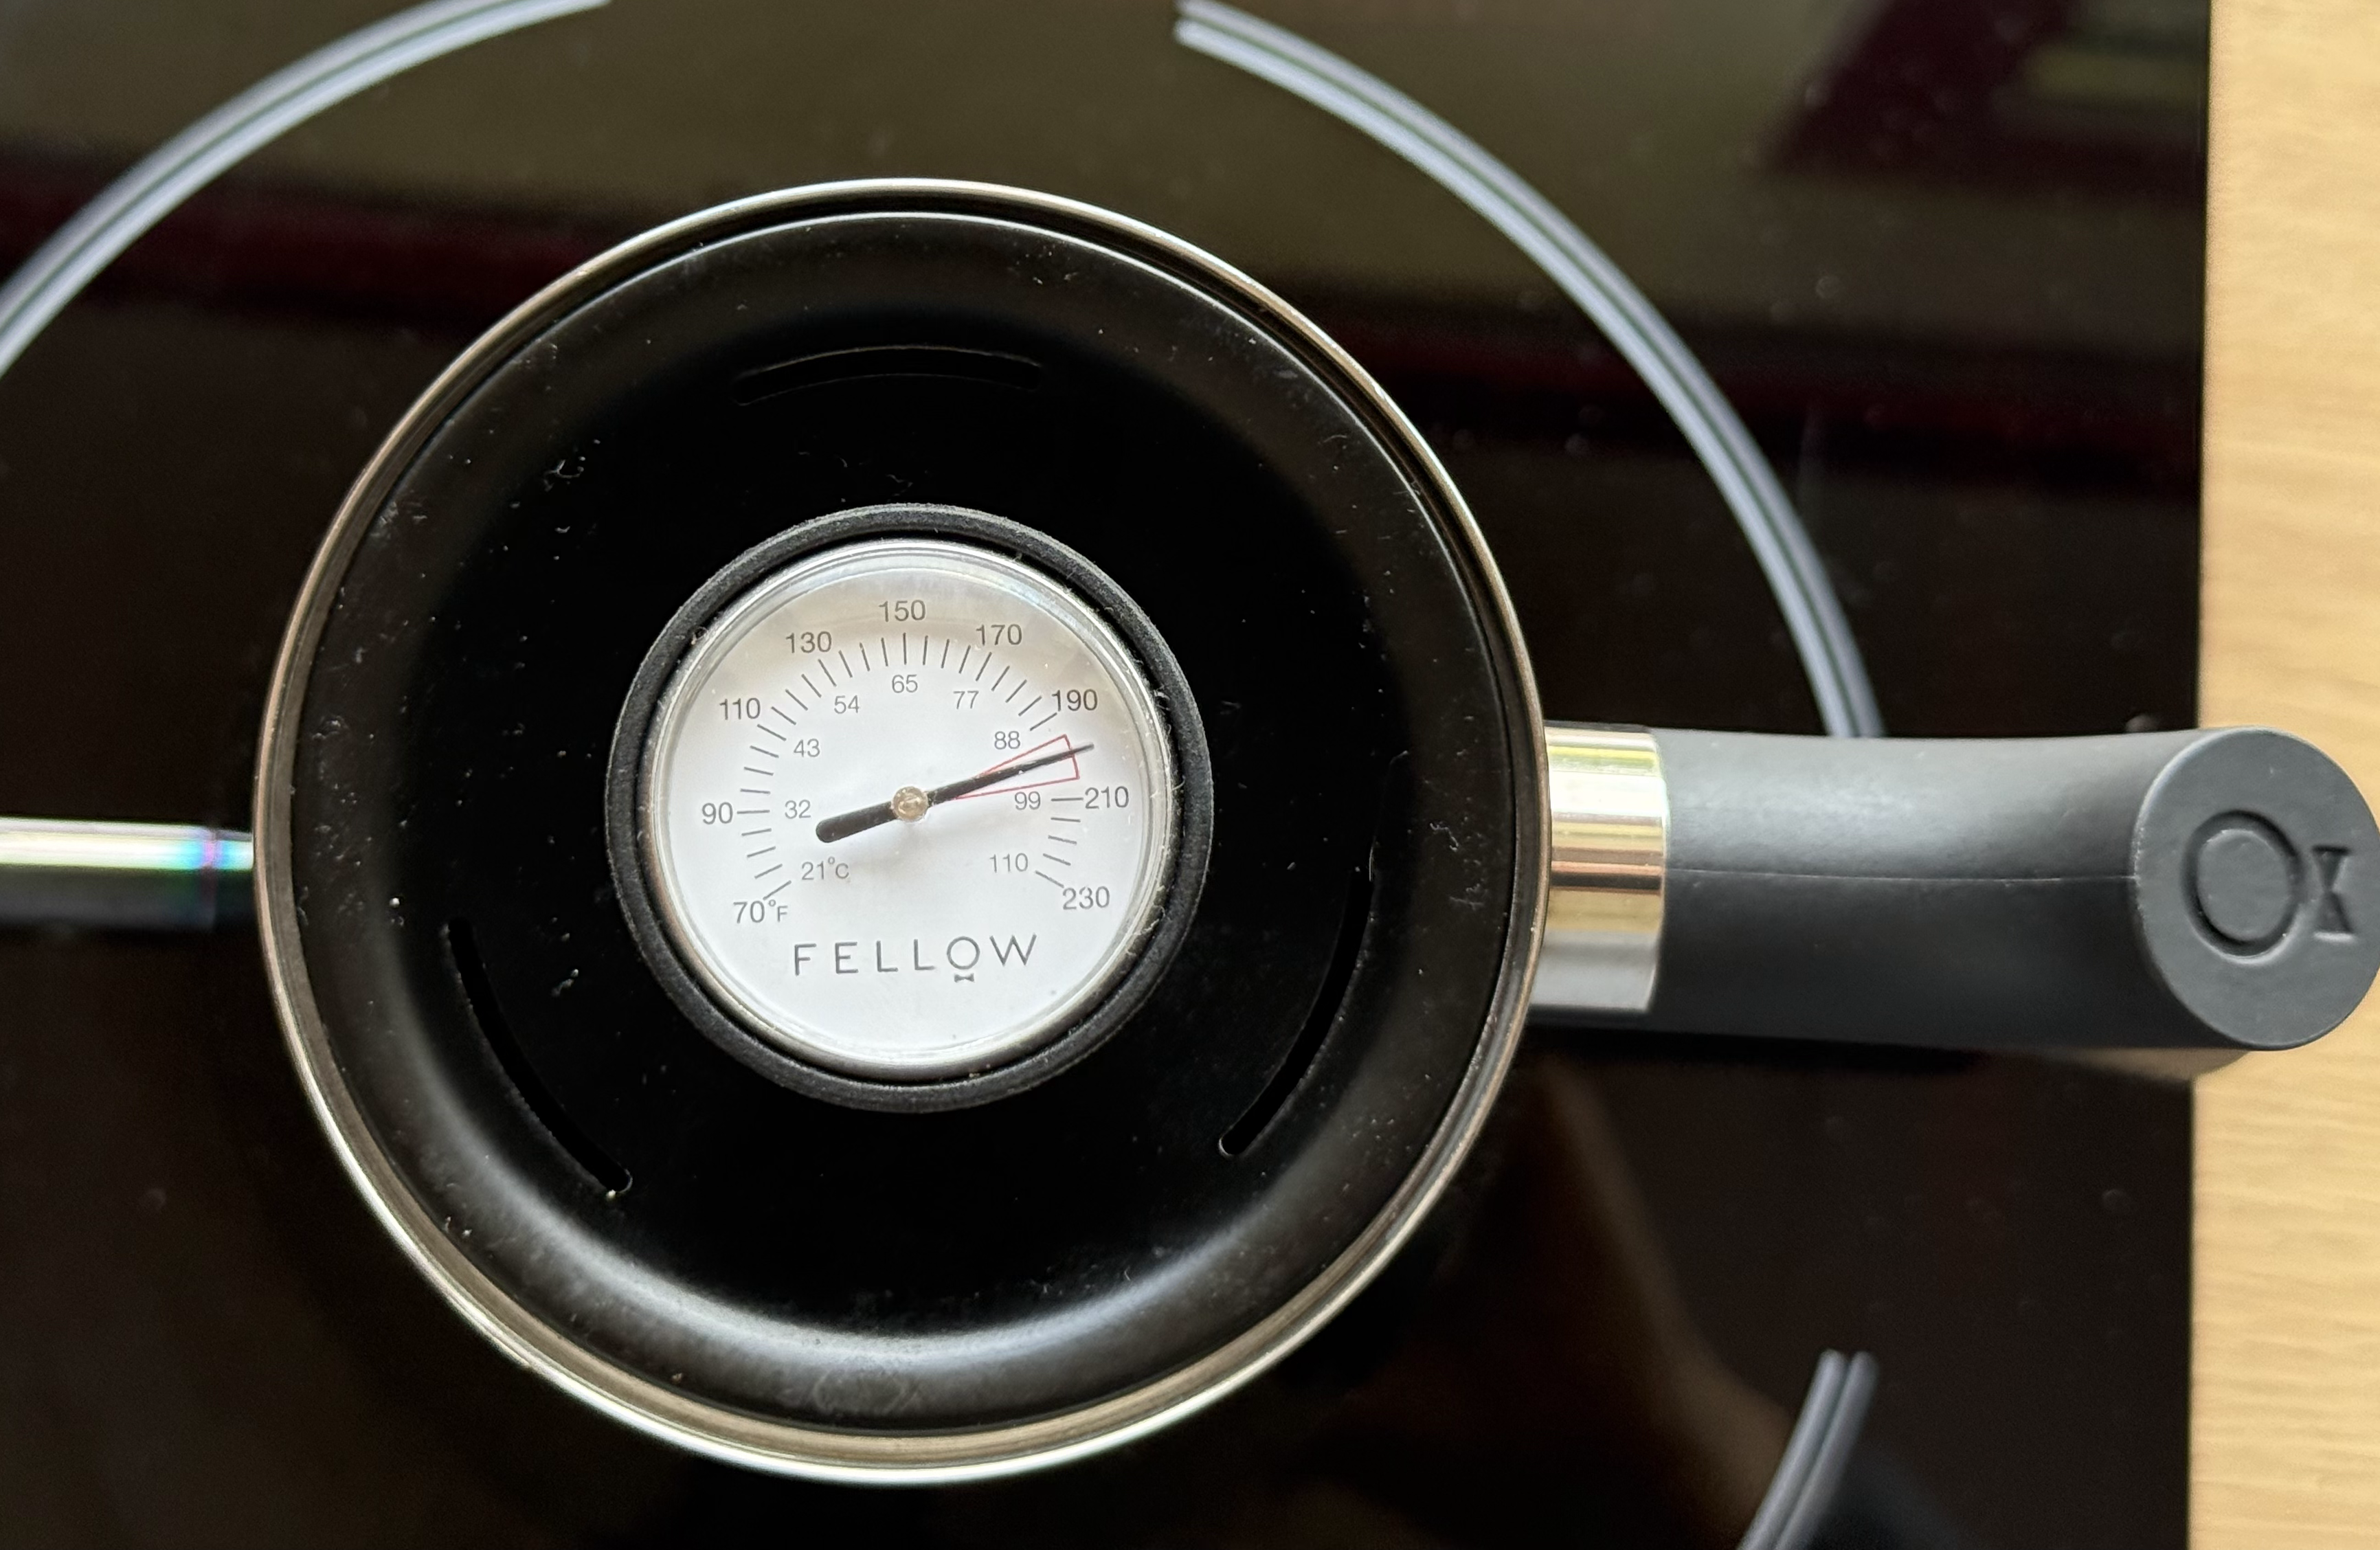
After the coffee is ground set aside and wait for the water to reach about 92c°-98c°[^3]. [^3]92c°-98c: In stupid units that is 200f° to 210f°. I use a hotter temperature if I am brewing a light roast coffee, with trial and error you’ll find the temperature that works best for your coffee beans.
After the water reaches the desired temperature pour a generous amount of the water on the empty filter as shown in the image. The point of this is to remove any “paper” flavors and, most importantly to pre heat our brewing vessel.
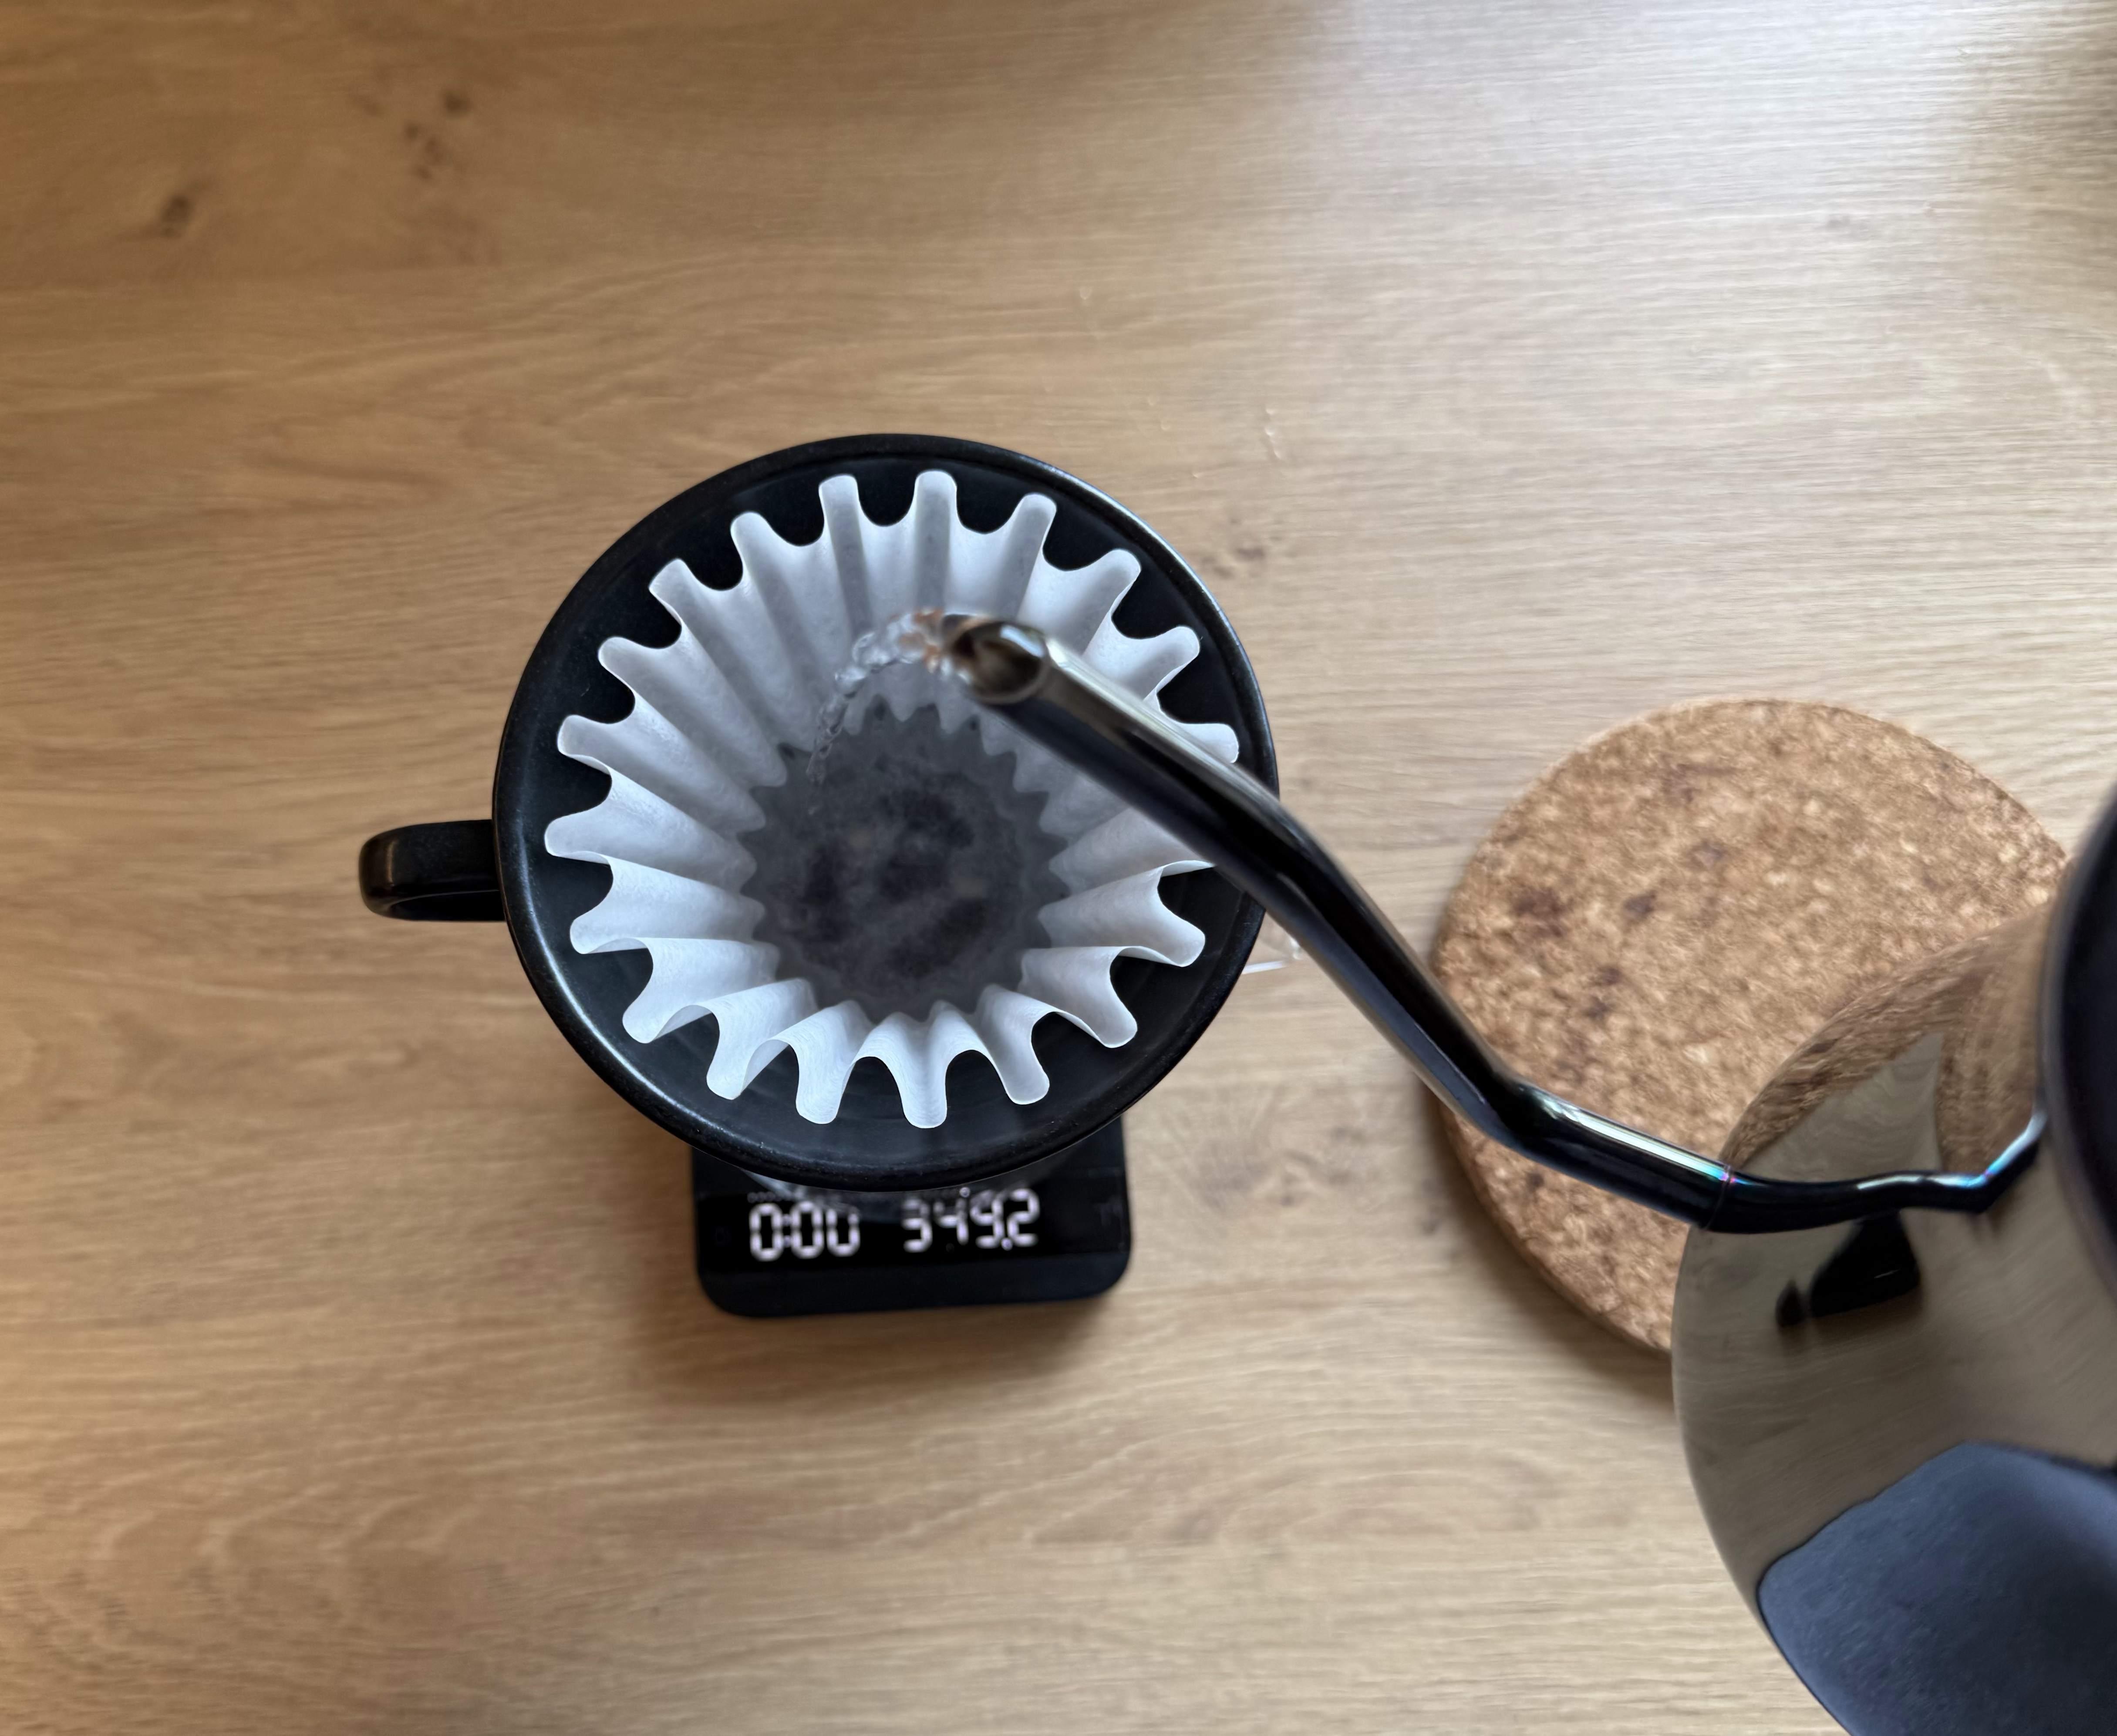
Don’t forget to throw away the water in the decanter!
The First Pour and The Bloom.
After the rinse, add the coffee to the brewer. Shake the bed of coffee so that it’s somewhat flat. Don’t forget to tare the scale. Also see her for grind size.
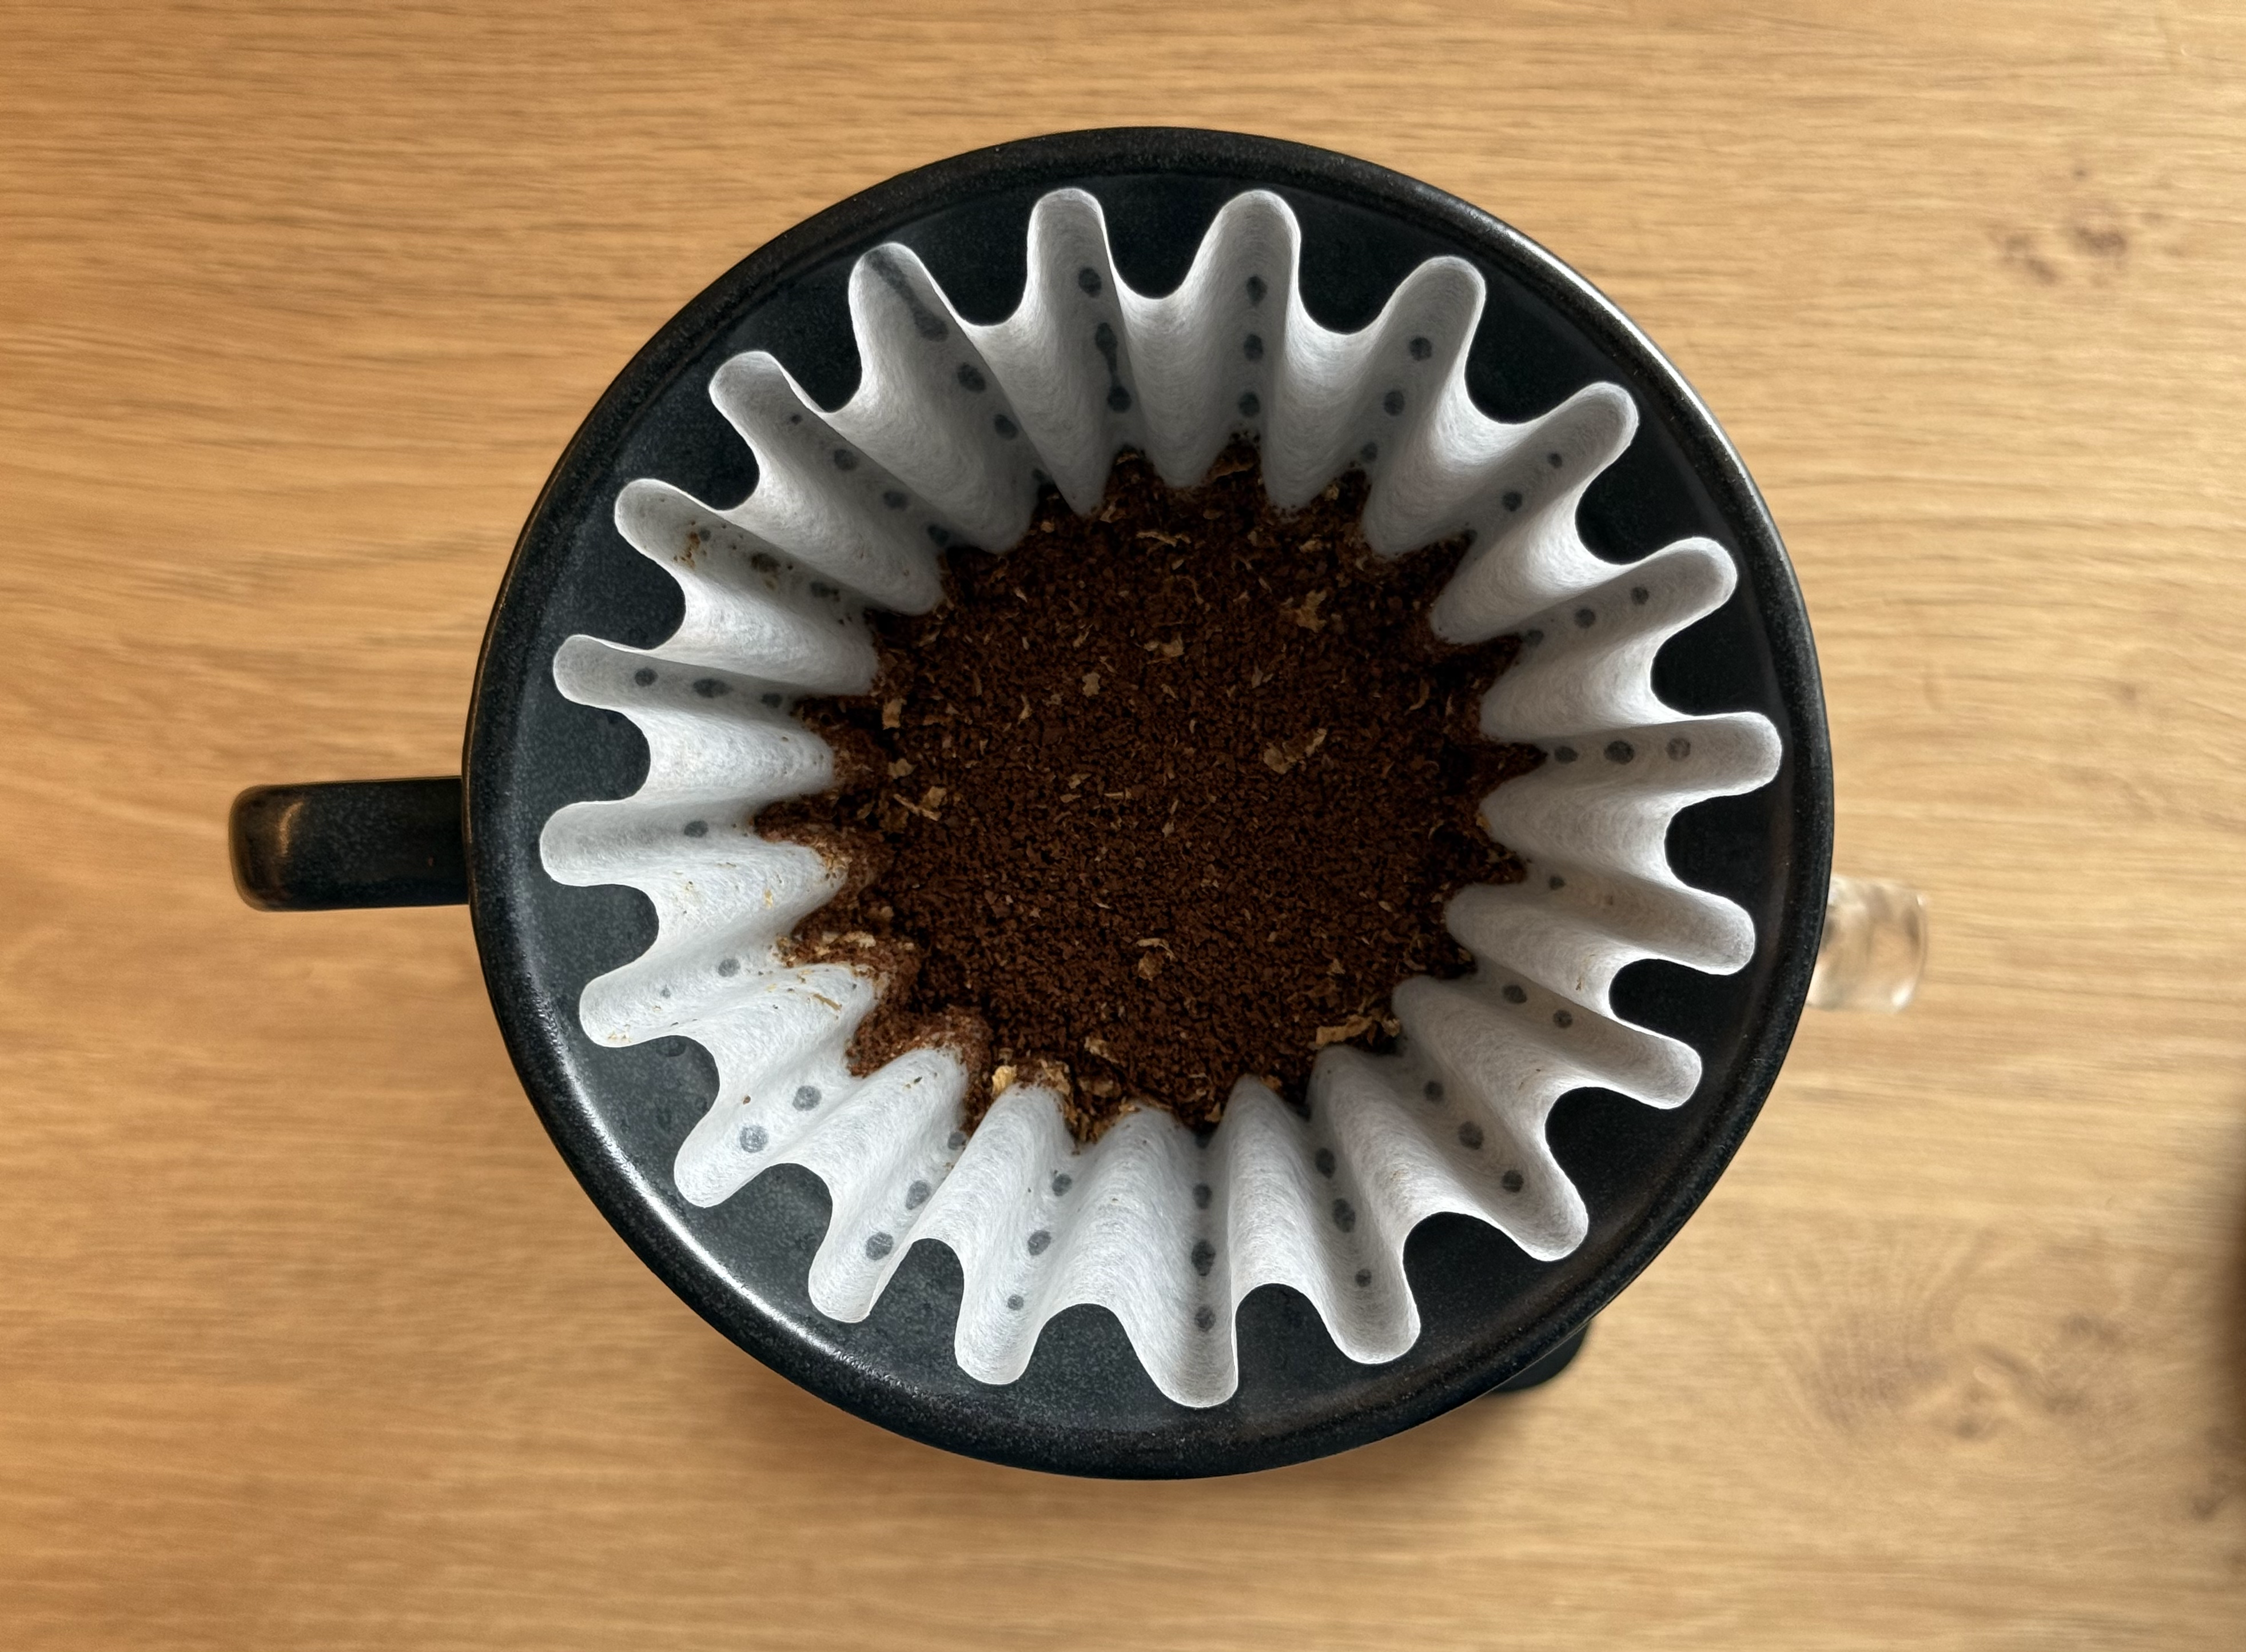
When you’re ready start the timer and begin to pour in a spiral pattern from the center until the weight is 40g. About two times the water to coffee for the bloom.
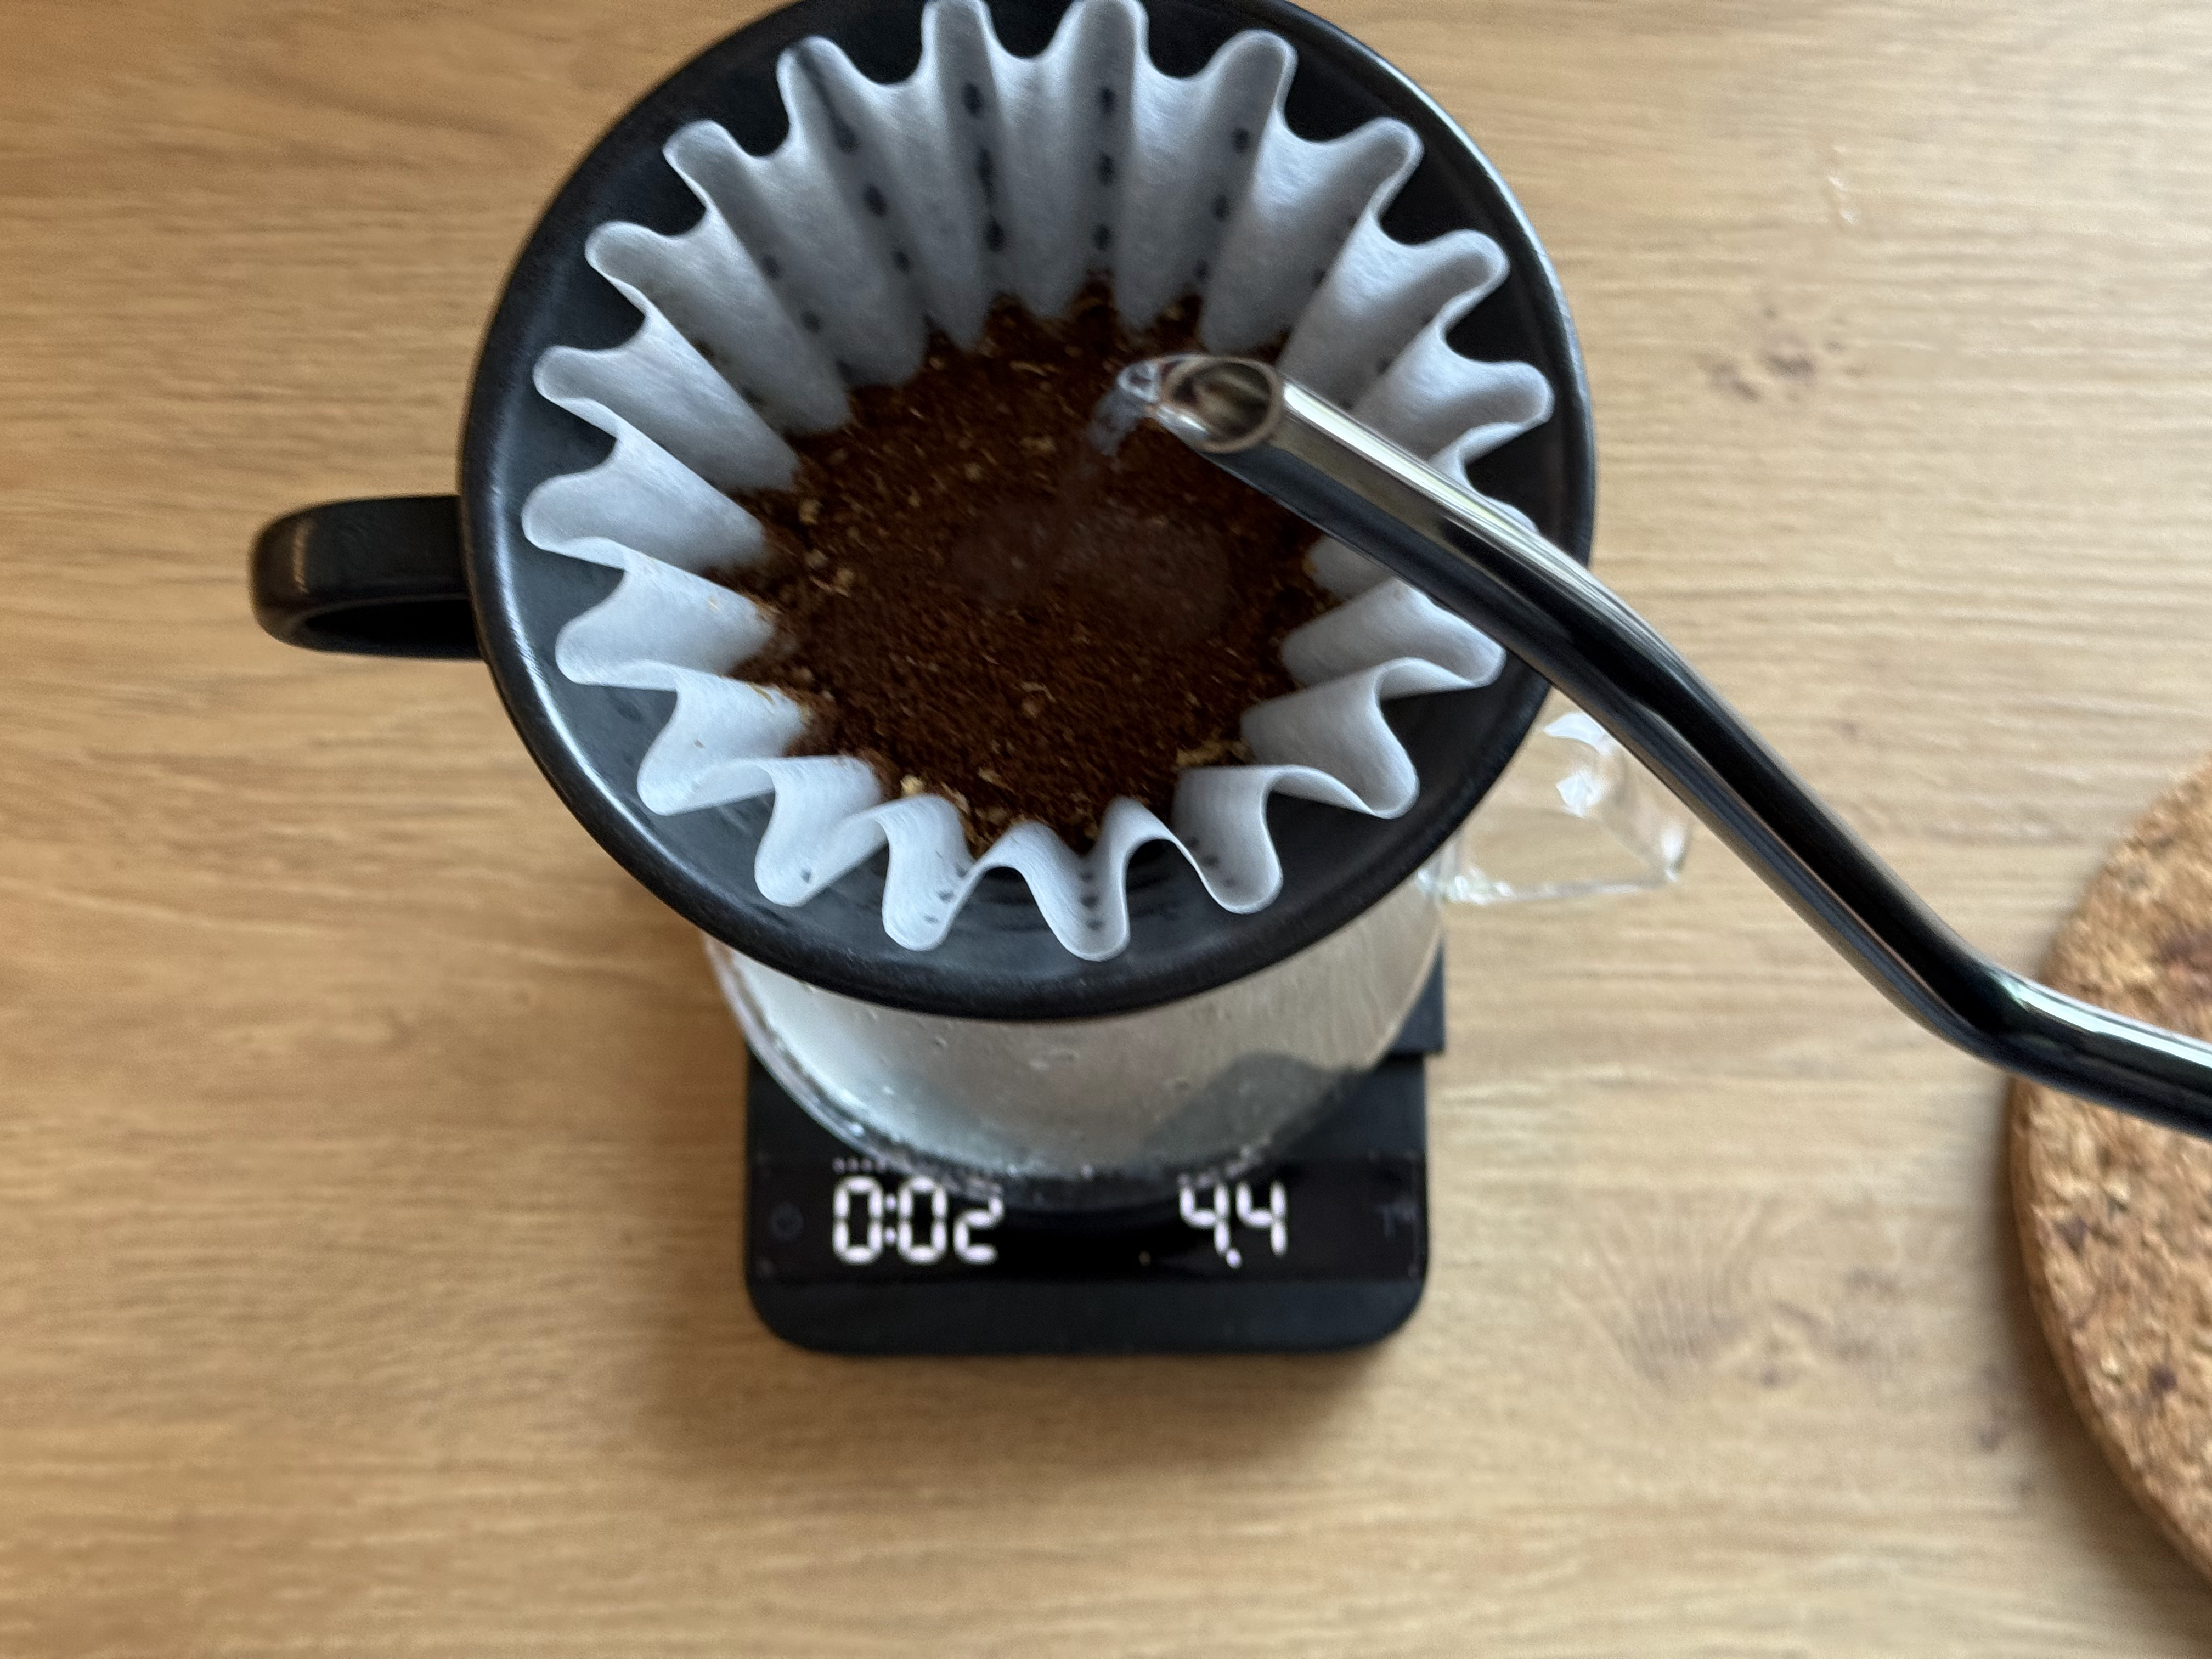
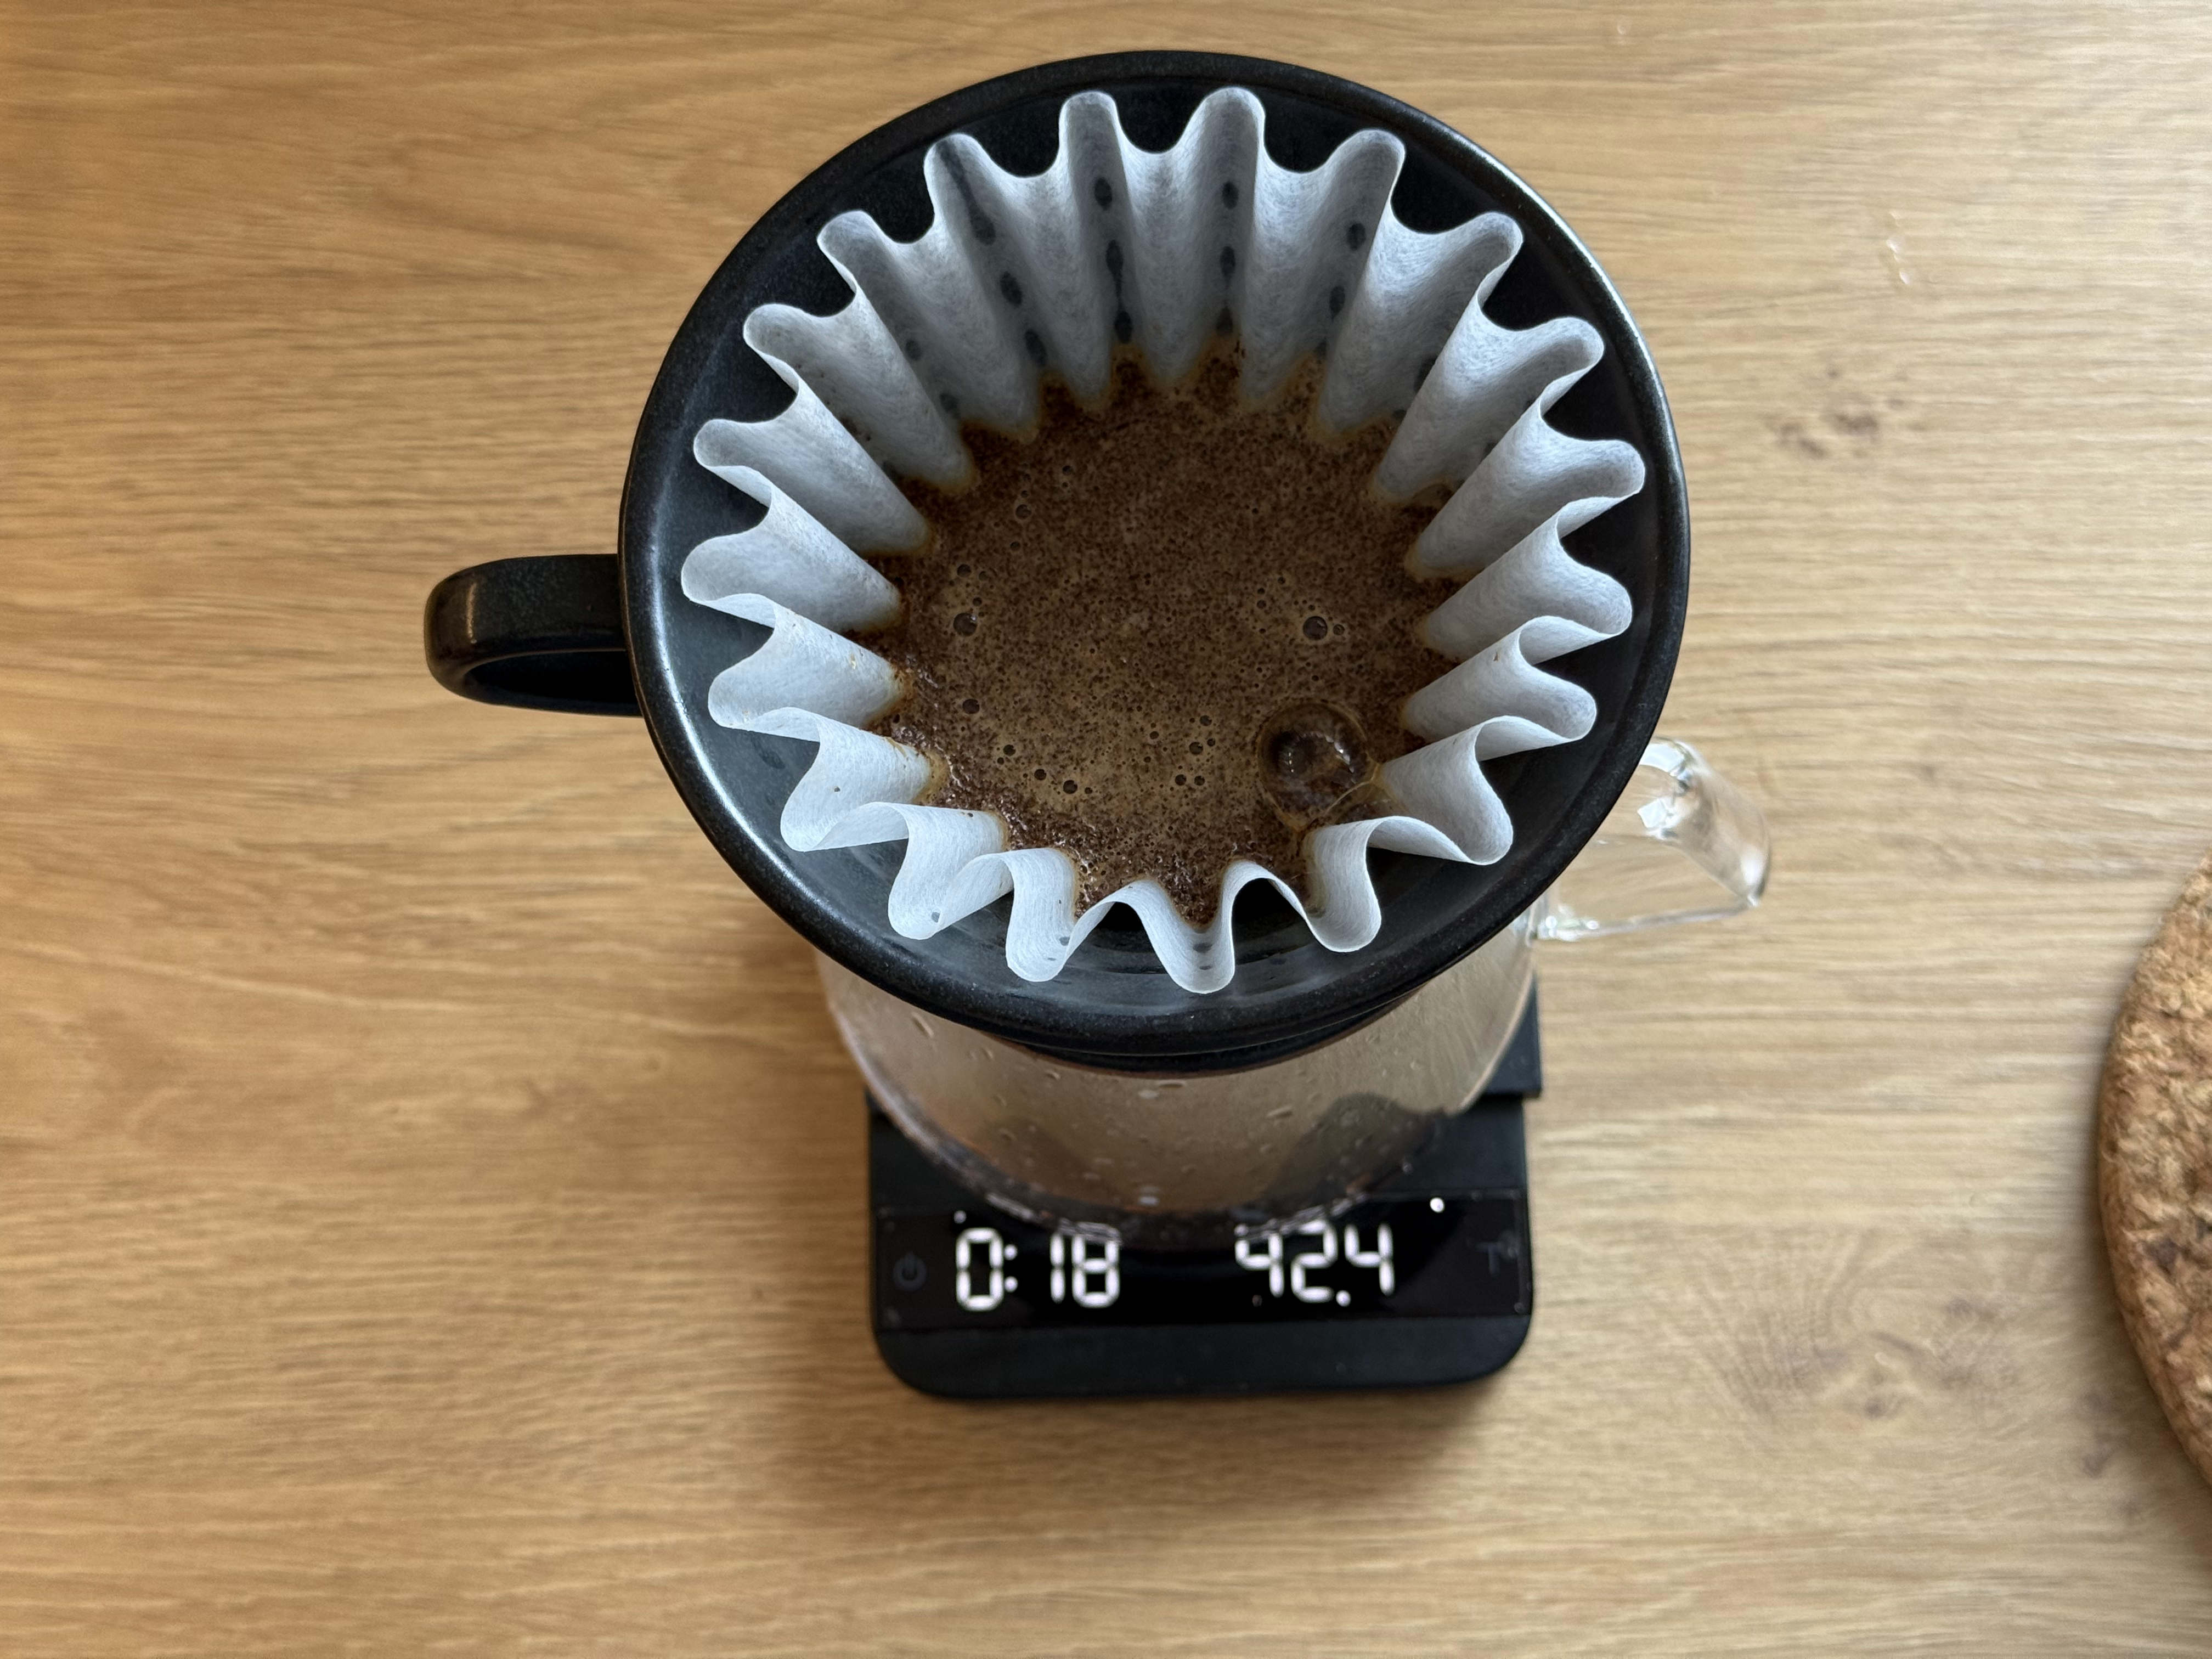
After pouring about 40ml of water, wait for 45 seconds to let the coffee bloom. This is an important step in the process of making coffee because it’s the first time the dry coffee meets with the water. The aroma starts to come out as the water dissolves the coffee and brings out the gasses made during roasting. A 45 second bloom is the standard bloom time for pour over coffees, it usually produces good enough results.
The Second Pour
This is the part of the brew where the bloom is broken and it releases all it’s lovely aromas. I aim straight at the center and begin with the spiral motion, outwards. After reaching the outer edge I go inwards and so on until I the scale weighs 200g. This should complete 2/3 of the total yield. This whole process should take no less than 30 seconds. After reaching 200g give a gentle shake to the brewer to make sure the bed stays flat, that will give an even extraction. A good way to know where you have poured before is by observing the foam, the darker foam is older, meaning that it has not been pour on. Keeping an eye on the water level, wait until the timer marks 1:30. If the water level starts to get close to the ground coffee before the 1:30 mark, then either you poured too fast or the coffee was not ground fine enough. To save this brew, begin to pour prematurely, very slowly to keep the coffee with a good layer of water and keep going until you reach 300ml the final weight.
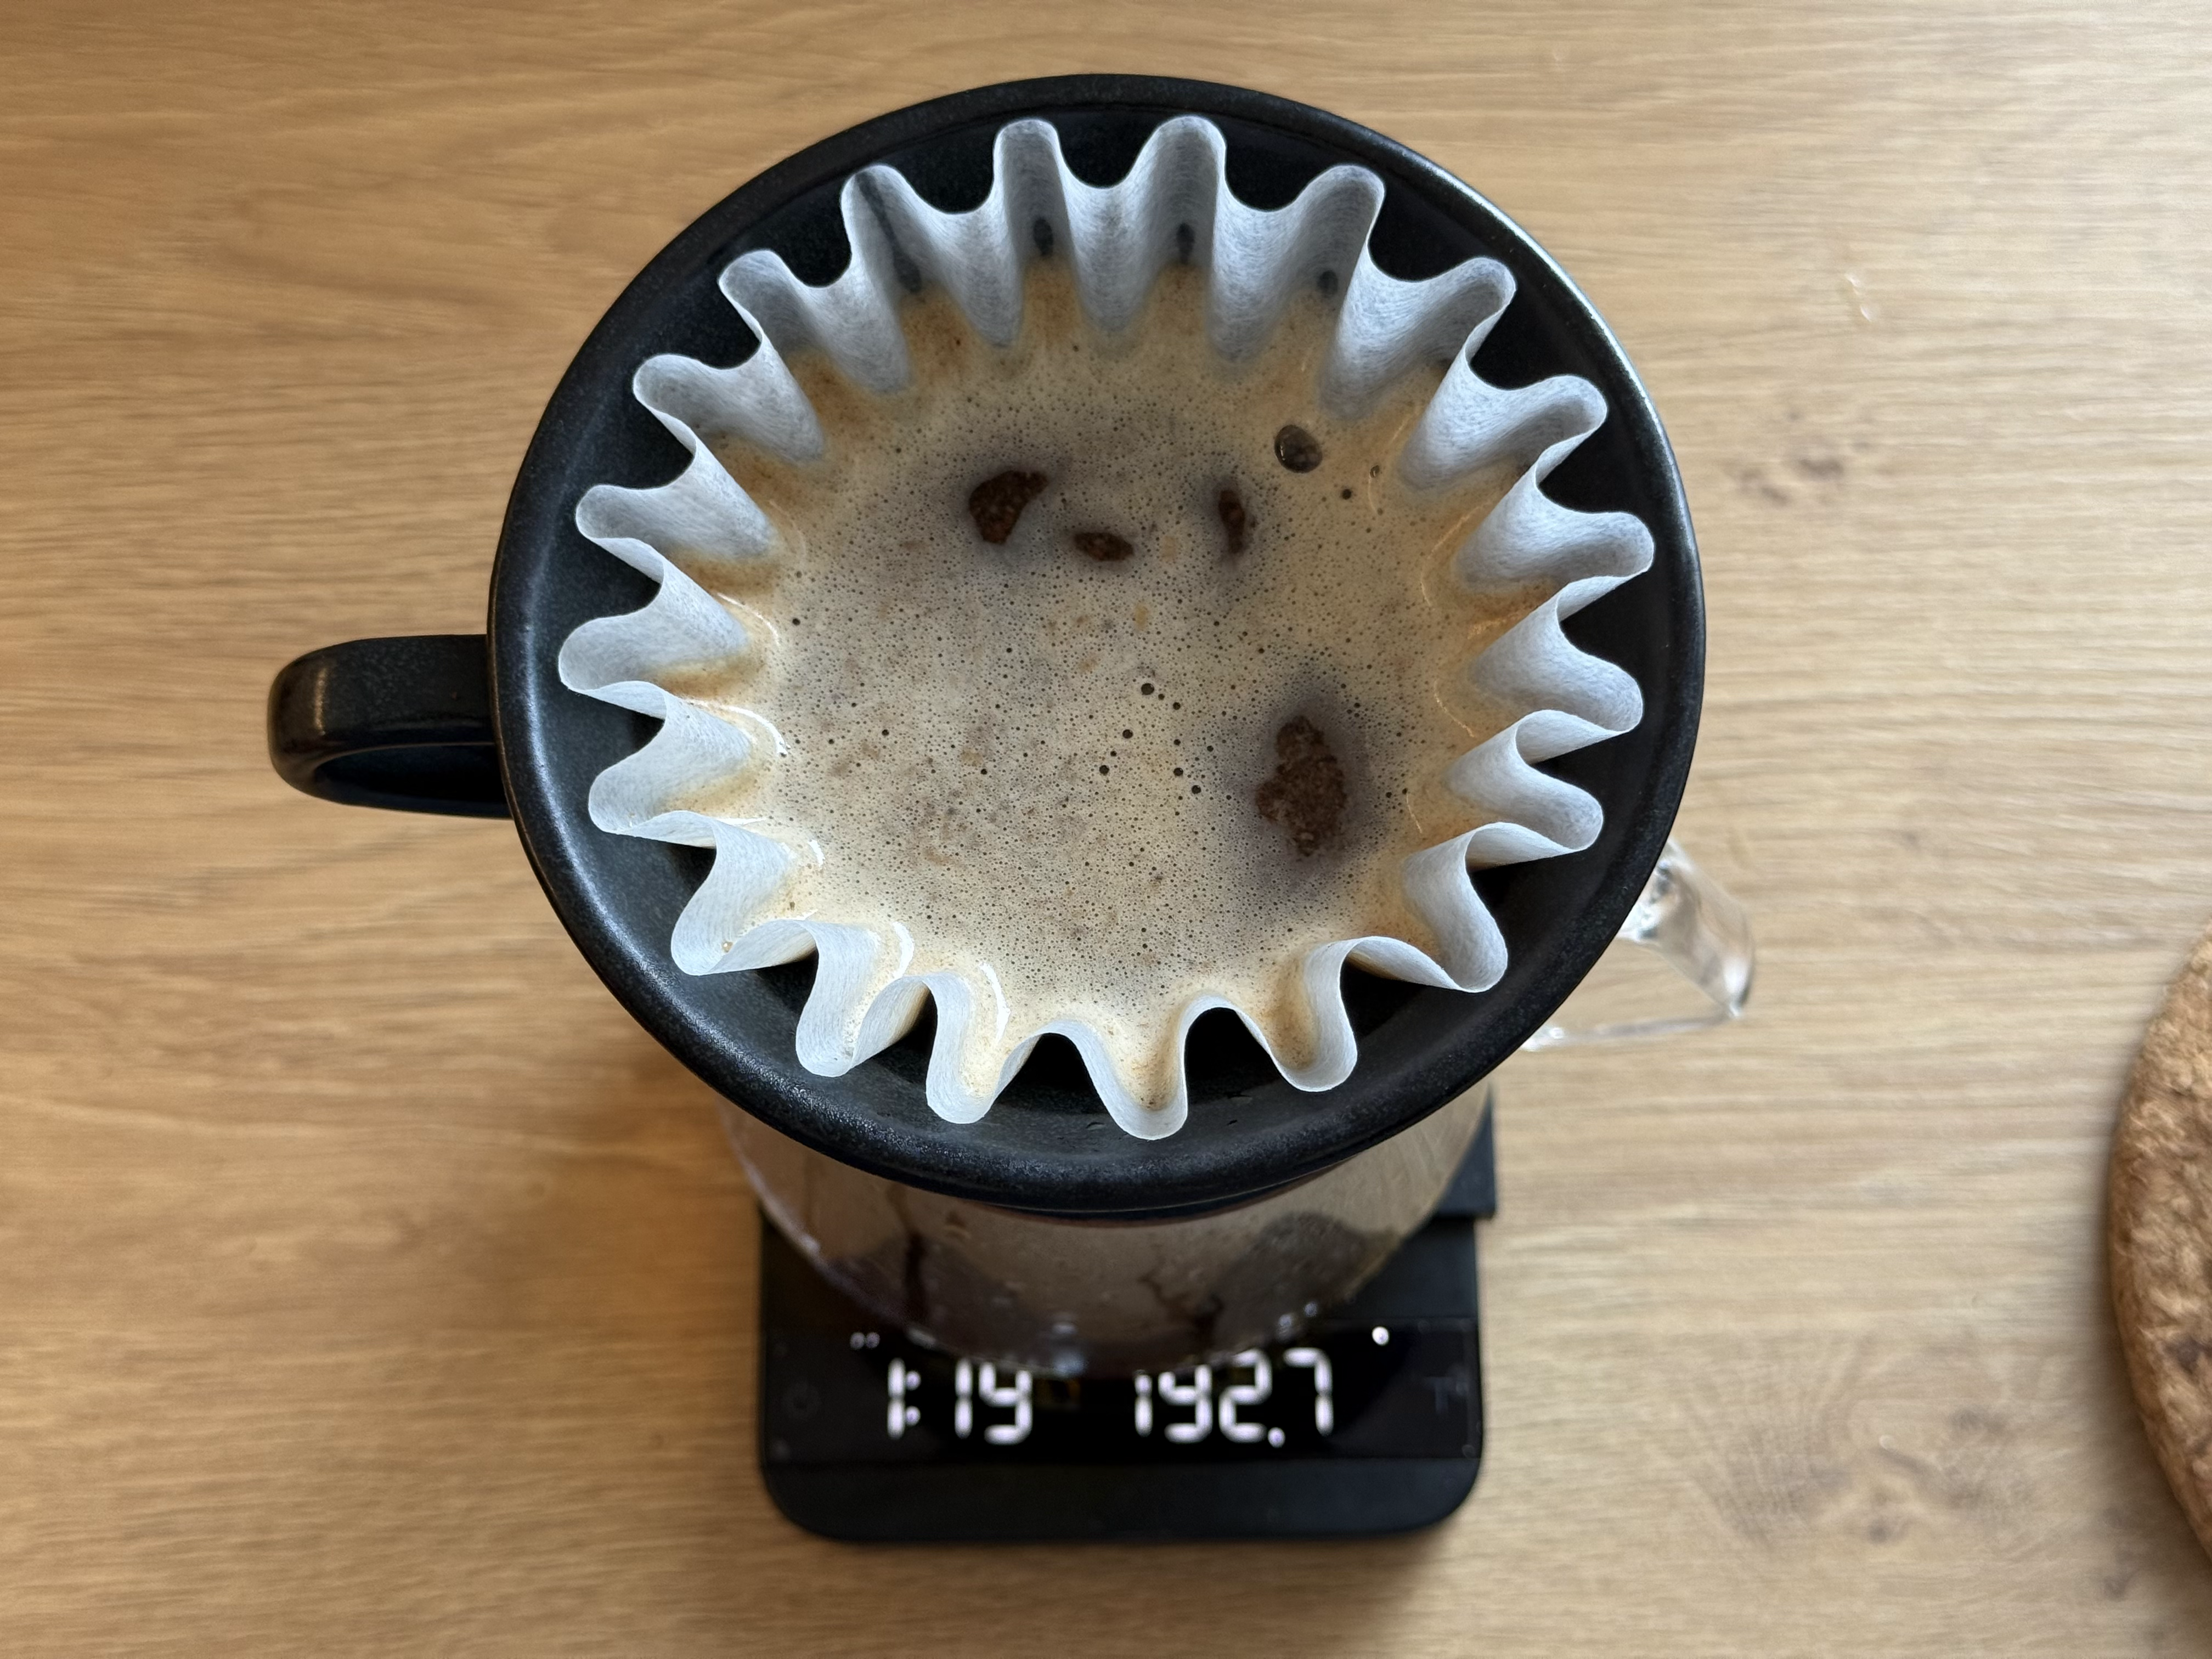
The second pour extracts the sweet and bright notes of the coffee, some coffees might benefit from a larger second pour, something more than 2/3 some might need less. In my experience, reaching 2/3 for the second pour is the perfect zone for a simple coffee in a light roast.
The Third Pour
Final pour. This pour should be one 1/3 of the total weight, that is 100g. Slowly pour the same as before until reaching the 300g mark, If it all went well, you finished pouring around the 2:15 mark or later, but no more than 2:30 mark. Give the brewer a gentle swirl and let it rest until all the water goes thought the coffee bed. If the water is overflowing, this is bad news, that usually means two things, either the coffee was too fine, or the filer got clogged. There’s no fix for this, the coffee will come out bitter. A good brew should finish around the 3 minute mark, earliest 2:45, but no later than 4:30. The longer the water takes the less it dissolves the flavors and beguines to dissolve the bean itself, creating bitter flavors.
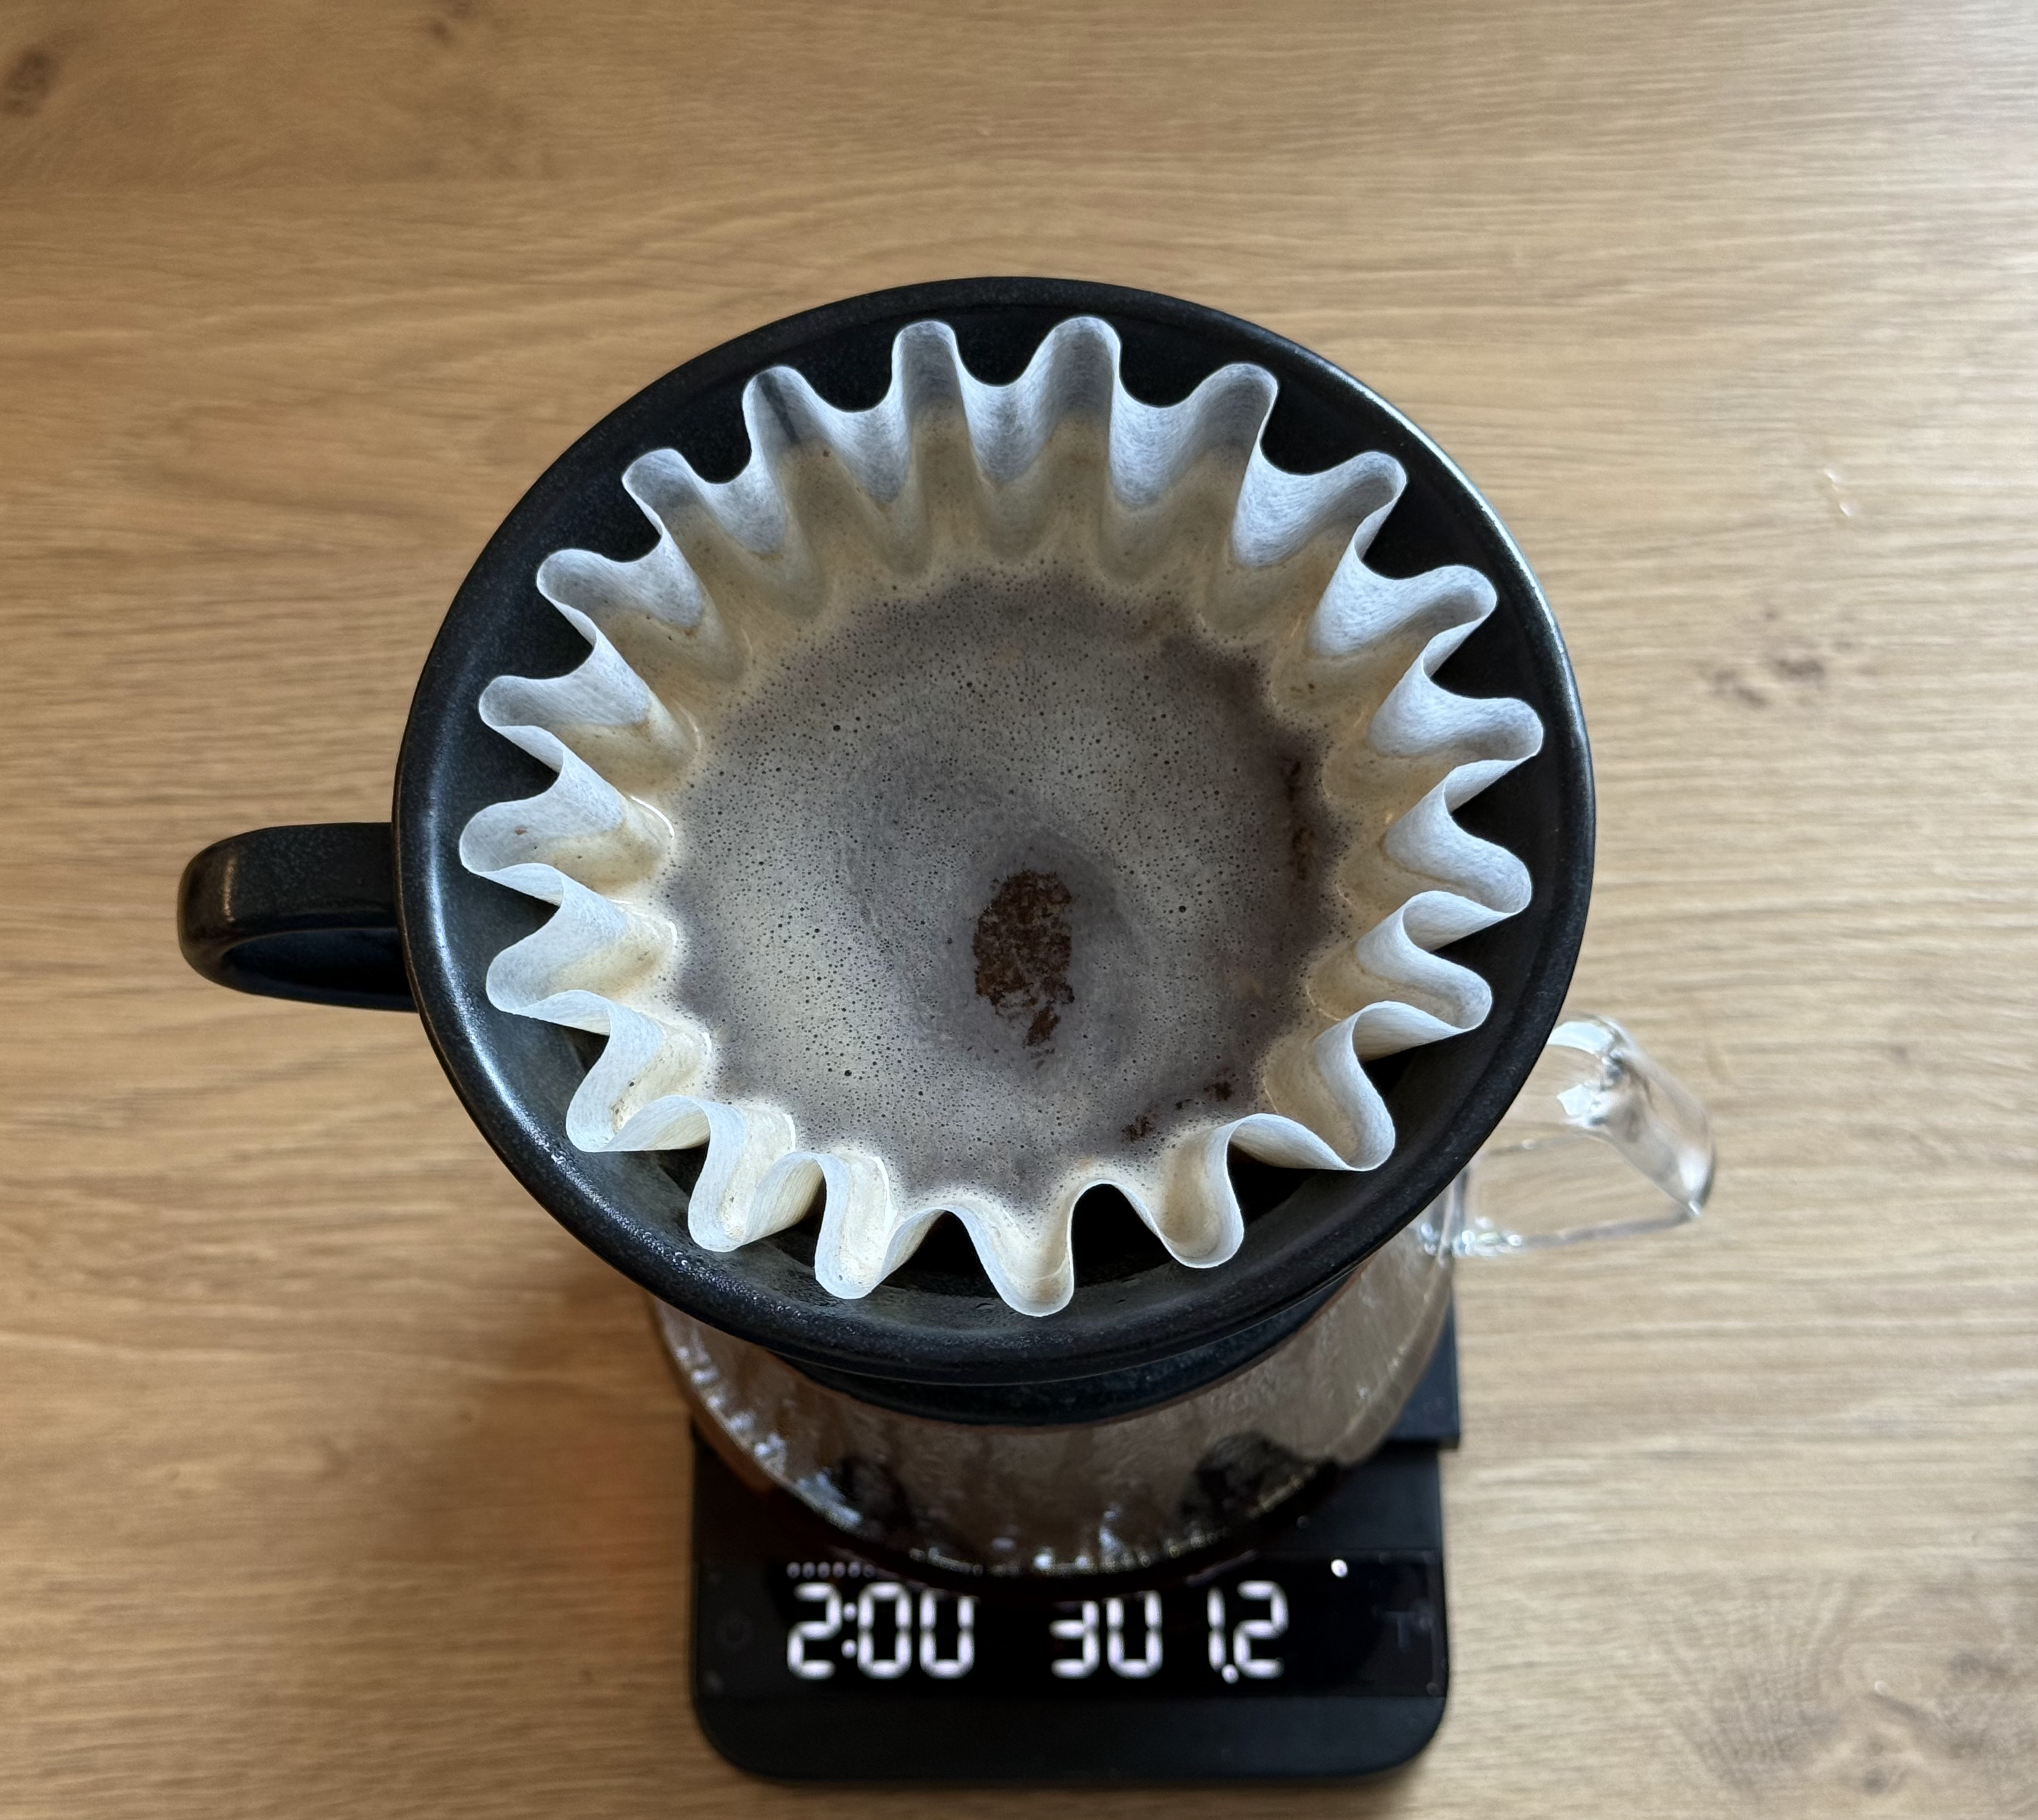
The third pour extracts the strong and darker flavor notes of the coffee, in this stage the seed itself beguines to dissolve in the water. Although it sounds not very appetising, hearing dark, strong notes in the coffee, this is super important for making a balanced cup. It makes coffee enjoyable and not like you’re sucking on a lemon.
The mark of a good job
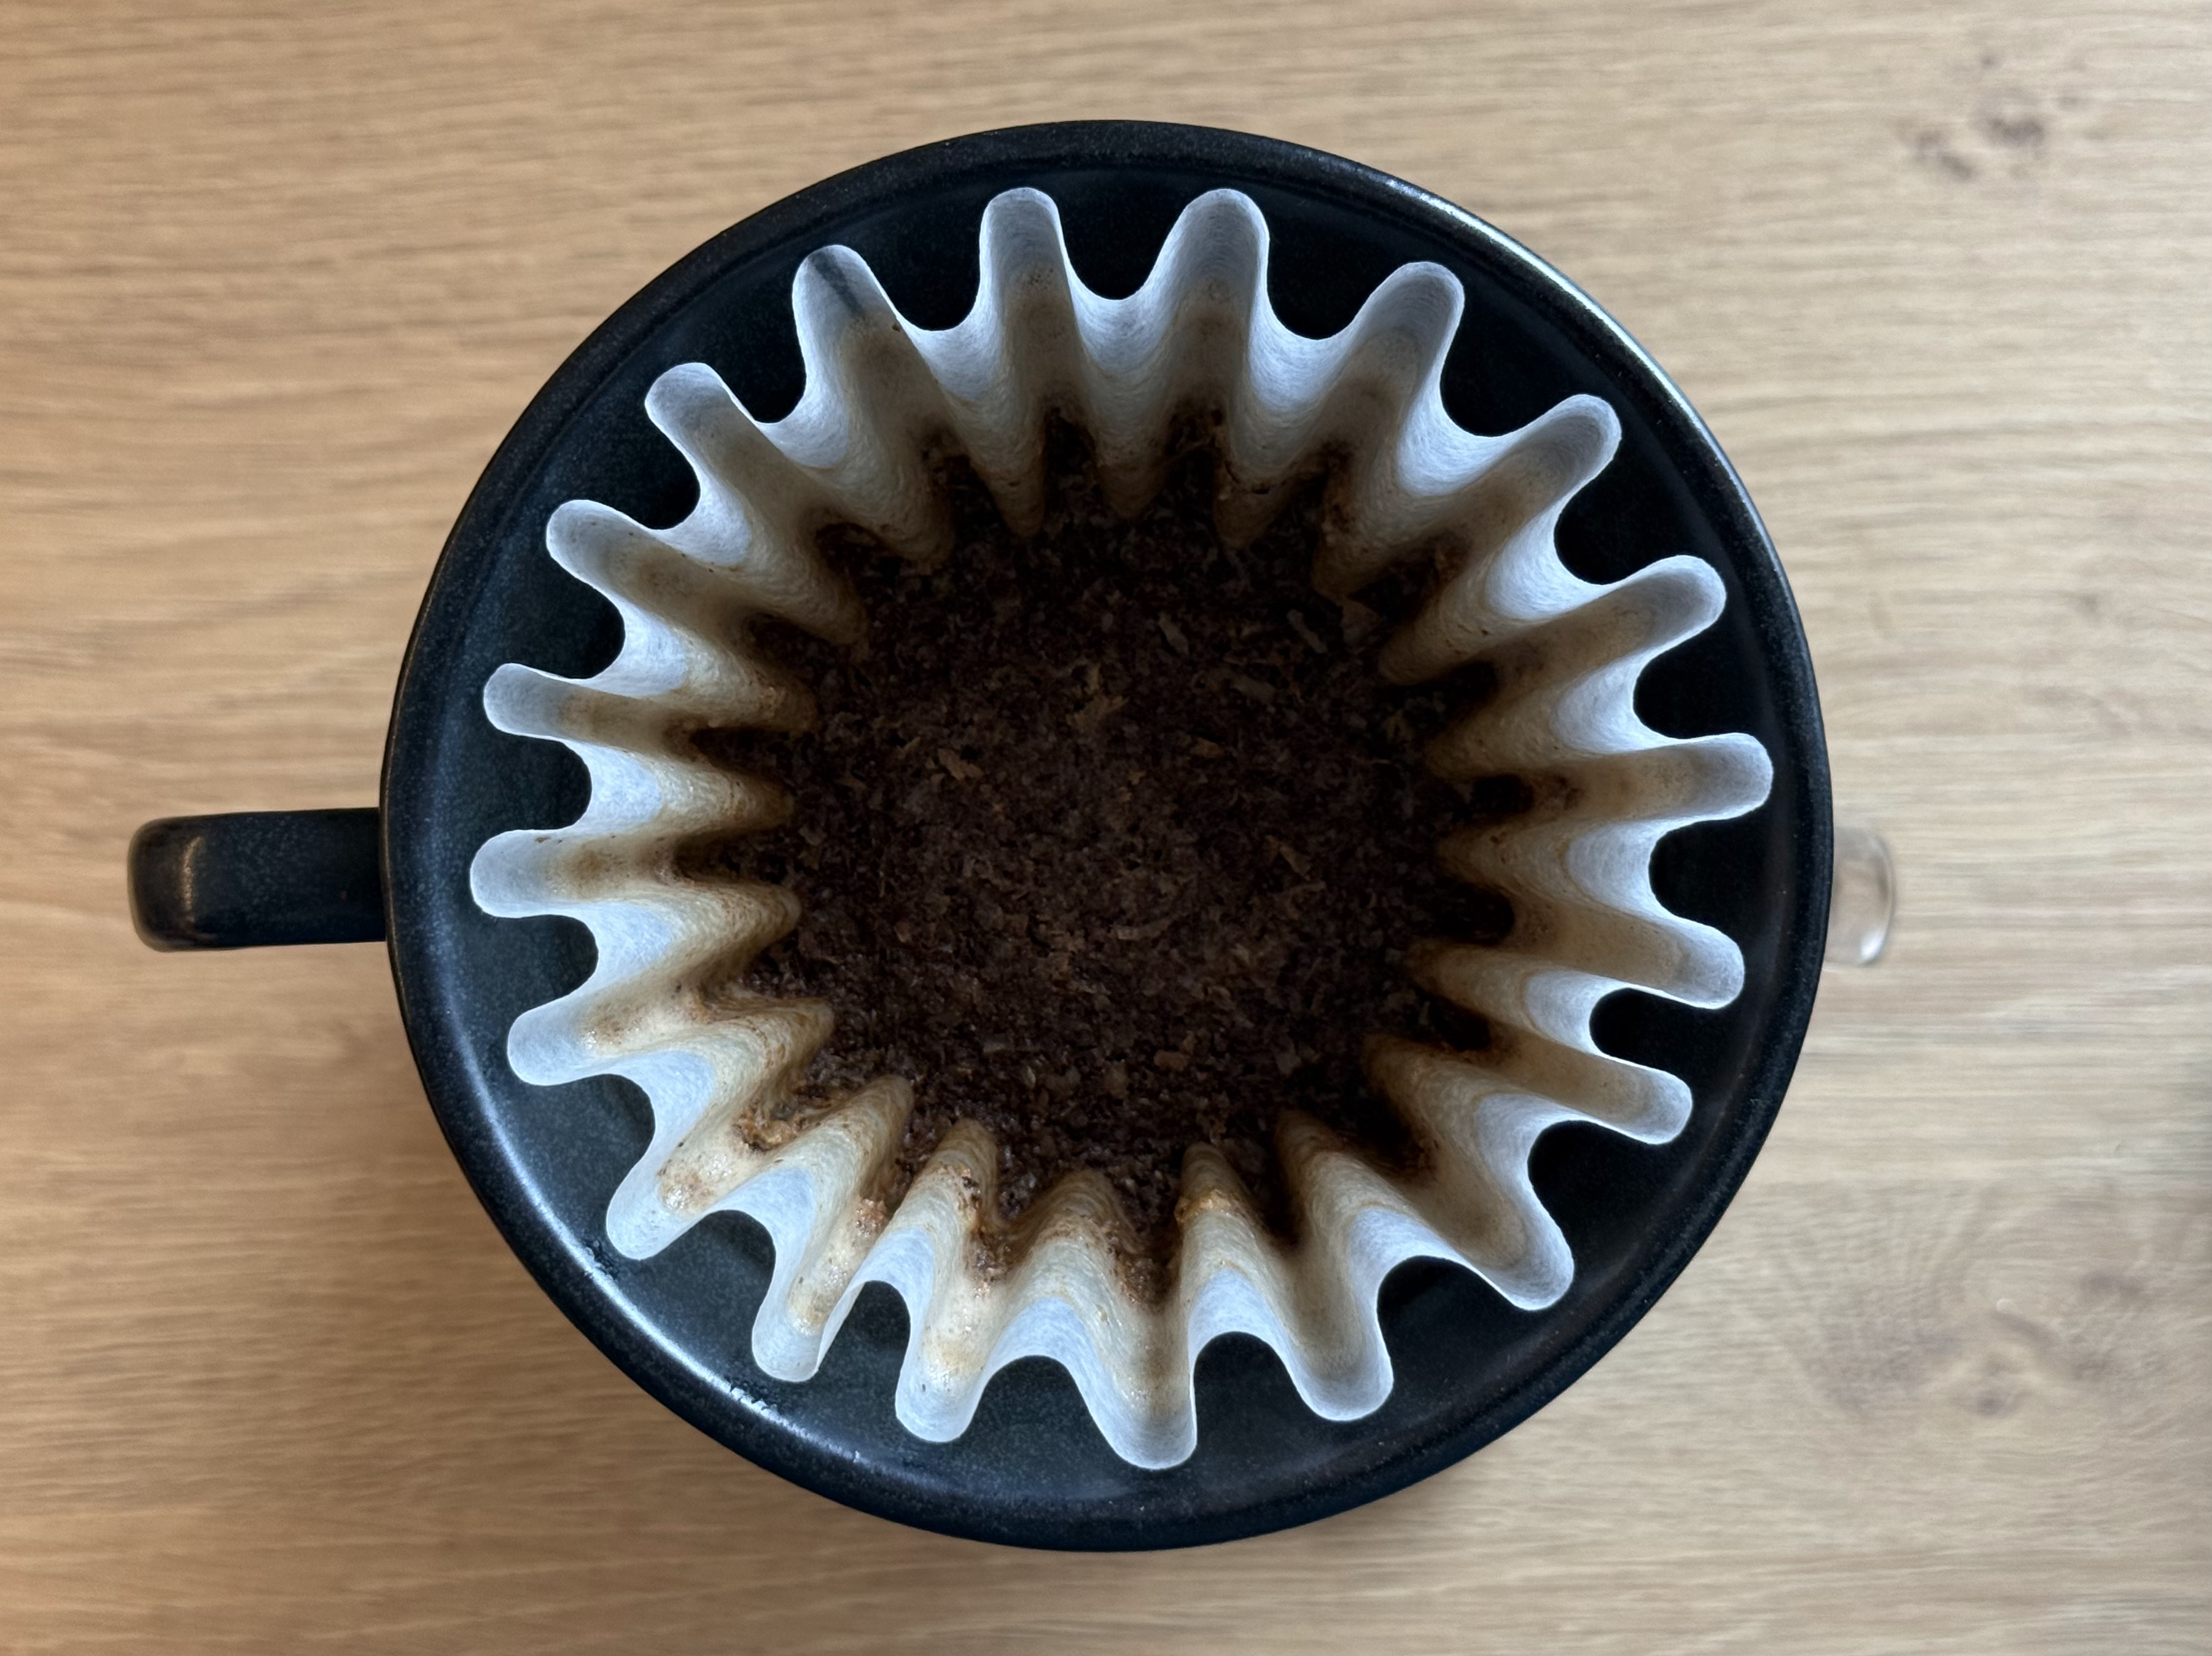
Excluding taste, you can tell if your pour over was executed correctly. The final coffee bed should look flat and dry. If the bed looks shiny or muddy, it means the grinder produced a lot of fine particles, this is undesired because it will give the coffee a bitter after taste. This could be a sing of a dirty grinder, or the burs have given out, but some times it’s just because the grinder is not very good, there are coffee sifters online to fix this, but that would go against practicality.
If the bed of coffee is uneven, having valleys or mountains, this is bad, because the uneven bead causes uneven extraction. The water will go though the path of least resistance, making some of the coffee over extract and some other coffee under extract. This usually tastes bitter and acid at the same time, not very pleasant. Thankfully the fix is simple, next time you pour be more careful, and do the gentle shakes. This is less than an issue with this brewing method because the Kalita has 3 holes that act as flow restrictors forcing the water to sit with the coffee regardless of how it is distributed on the bed. That being said the Kalita brewer is not a magic brewer, you still need to be careful.
Enjoying the Coffee
Give a little shake to the coffee brewer to get the last drops of coffee out and carefully throw away the filter with the coffee, compost it if you wish. Give a rinse to the brewer. Don’t forget before drinking the coffee to use the teaspoon and mix the coffee in the decanter. Coffee as it brews pulls out different flavors, the first drops are acidic while the last drops are very bitter, this is why it is super important to stir well the coffee before drinking.
Don’t drink the coffee too hot, let it get to a comfortable temperature in the cup before drinking, this is because the coffee acids have not yet degraded, waiting a little takes the edge off making it more enjoyable.
Don’t even dare to put milk and sugar, I will come for you!
I hope this has been helpful. This is all from years of experience both at home at at the coffee shop. This recipe is not design to win any competitions, but it is designed to provide you at home with a reliable cup of coffee at home. This recipe brews enjoyable coffee 99% of the time, and it’s super forgiving if you make any mistakes, as it naturally happens in the morning. Hope it helps. And if you have any ideas, questions suggestions, reach out!.